Develon SS22, SS34 Attachments User Manual (AA099-0133)
Develon SS22, SS34 Attachments User Manual (AA099-0133)
Develon SS22, SS34 Attachments Index:
SS22/34
Foreword
• Please read and understand this manual before operation, inspections and maintenance of the steel shears. Keep this manual with your equipment all the time for your quick and easy reference, and read it regularly.
• Do not operate the steel shears until you have been trained in the use of all operating controls and understand the hydraulic steel shear operation.
• Get a replacement manual from DEVELON or local distributor if you lost it.
• If you transfer the steel shear to the other, do transfer this manual as well.
• The figures in this manual are for better understanding and may not correspond exactly to the steel shear. For exact shape, refer to the parts list or ask DEVELON or local distributor.
• For the purpose of constant product improvement, some parts of this manual may be changed. If you found the parts unclear or not corresponding to the steel shear, call and consult DEVELON or local distributor.
• Important information on safety is described in the safety information chapter of this book. Be familiarized with the instructions on the safe operation and observe the instructions before and during operation.
• Injury, death or damage caused by unauthorized product modifications and operation under unallowed application will not be responsible by HD HYUNDAI INFRACORE. Consult DEVELON or local distributor for such modifications and applications.
• Use HD HYUNDAI INFRACORE genuine parts. HD HYUNDAI INFRACORE takes no responsibility for damages caused by use of non-DEVELON genuine spare parts.
• For warranty, we refer you to the warranty conditions provided separately.
Safety Information
Remember! Safety is Up to You
Signal Words
Basic Safety Information
Know Yourself
Know Your Equipment
Know the Work Site
Know the Rules
Preparation for Safe Operation
Install the Steel Shear on the Suitable Carrier
Protect the Operator from the Flying Splinters
Safety Instructions on the Steel Shear Installation
Check the Steel Shear and Carrier
Check Safety in Work Site
Safety Information for Operating the Steel Shear
Never Operate in Unallowed Applications
Operate from the Top Downwards
Never Use for Transportation Purpose
Never Use for Hammering or Ramming
Prepare a Escape for the Carrier
Stop Operation on Finding Uncertainties
Pay Attention During Operation
Safety Information for Maintenance of the Steel Shear
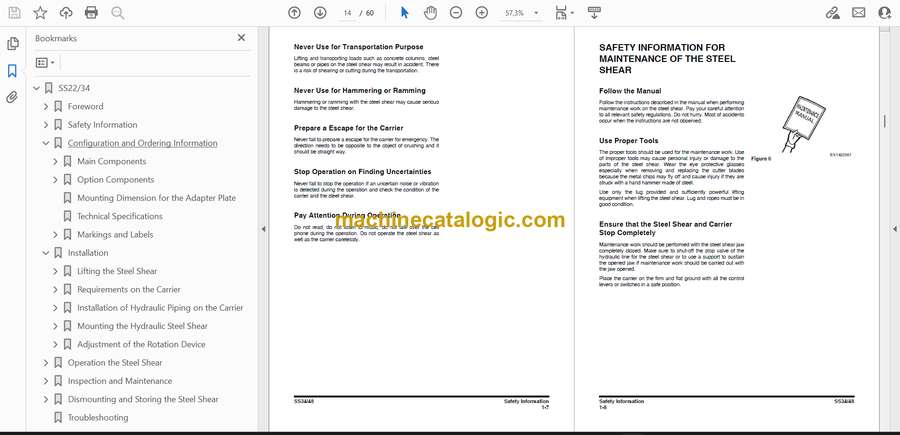
Follow the Manual
Use Proper Tools
Ensure that the Steel Shear and Carrier Stop Completely
Pay Attention to Hot Oil and High-pressure in Hydraulic System
Wet Ground may be Slippery
Do not Alter or Modify
Configuration and Ordering Information
Main Components
• Steel shear ass’y
• Operation manual
• Standard accessories (fittings, hoses, blade adjust kit, etc)
• Standard tool kit
• Parts list
Option Components
• Standard mounting cap 1) (can be installed on most popular carriers)
• Mounting pin & bush set 1)
• Special tools for cylinder maintenance
• Piping kit 2) (including the hydraulic rotation circuit)
Mounting Dimension for the Adapter Plate
Technical Specifications
Markings and Labels
DEVELON Logo
CE Label
Stay Clear
Lifting Point
Greasing Port
Keep Away
Do not Reset
Caution in Operation
Risk of Serious Injury
Installation
Lifting the Steel Shear
• Move the steel shear with the jaws completely closed and hydraulic lines plugged.
• When lifting the steel shear, use only the lug provided and sufficiently powerful lifting equipment.
• Ropes and rugs must be in good condition.
Requirements on the Carrier
• Carrier weight: The excavator may fall over if the capacity is not good enough to use the steel shear or if it is equipped with a long boom and/or a long reach arm. Proper excavator should be decided for use with the steel shear or such long boom…
• Hydraulic system: For the hydraulic steel shear, the inner diameter of the hydraulic line must be followed by the technical specifications. If the inner diameter is small inadequately, back-pressure increase and the hydraulic oil in the lines may…
• Retrofitting from breaker piping to steel shear piping:
Installation of Hydraulic Piping on the Carrier
Basic Circuit for Steel Shear Piping
• Relief valves to set the maximum pressure in jaw opening and closing operation.
• Relief valves to set the max. pressure in rotation operation (but, it is not necessary if output flow of the rotation circuit is smaller than maximum flow rate for rotation. Refer to chapter, “Technical Specifications”)
• The circuit to prevent cavitation in the rotation line when rotation motor stops (The hydraulic motor may be damaged if this circuit is not installed)
• Stop-valves in the connection with the hose from the steel shear.
• The circuit to release the residual pressure in the rotation motor when rotation motor stops. (If the steel shear has a slewing brake.)
• By this kit, all of Jaw opening, closing and rotating of the steel shear can be carried out with one spare valve of the carrier. For more information, ask DEVELON dealer.
Mounting the Hydraulic Steel Shear
• Attach the mounting cap to the base plate using bolts, spring washers and nuts. We recommend you to double the nut, and never neglect to use the spring washer.
• In case both pin holes of the mounting cap are not on the same level, operating direction should be considered to decide on pin hole for each arm and link arm of the carrier. If main operation is upward, the carrier’s arm needs to be connected wi…
• Check the direction of hose connecting port. Piping line on the carrier should be in the same direction as the ports of the steel shear. The followings are the directions of hose connecting port of the steel shear.(Figure 13)
• Before mounting the steel shear, please put it on the flat place to take care of the direction of the mounting cap as the drawing.
• Set the carrier’s engine speed to low idle, and move the stick of carrier slowly until its hole is aligned with that in the mounting cap. Insert the mounting pin and assemble the stopper and its fasteners. According to mounting cap, the stopper a…
• Move the shovel cylinder and align the hole of carrier link with that in the mounting adapter in the same way as the Step 2.
• Remove the end caps from the connection ports on the steel shear and the stop valves on piping line, then connect the main port and rotation port each other with proper hydraulic hoses.
• The connecting threads must be undamaged and clean from sands, water, etc.
• Open the stop valves on piping line.
Adjustment of the Rotation Device
• Port for pressure check is positioned in both ports ‘RA’ and ‘RB’. Place a pressure gauge into either port, and set the minimum pressure unscrewing the pressure relief valve to the end. The pressure gauge must be for 400 bar or more.
• Place the steel shear to the ground or the other strong structure so that the steel shear can not rotate.
• Increase pressure by screwing the screw adjuster until the pointer of the pressure gauge reaches the recommended pressure with the rotation actuator of the carrier switched on.
• Pay attention to the max pressure since motor life will be reduced if it is used over maximum pressure.
• Position the steel shear for rotation, and rotate it.
• Set the rotation speed by adjusting the flow control valve in the carrier’s rotation pipe.
• The proper rotation speed is 7 ~ 12 rpm and it must not exceed 15 rpm.
Operation the Steel Shear
Preparation for Safe and Correct Operation
• Mechanical connection between the steel shear and the carrier
• Locking status of the mounting pins
• Hydraulic connections between the steel shear and the carrier
• Exact setting of the relief pressure
• No oil leaks from the hydraulic connections and any parts of the steel shear
• No defective or loosened parts of the steel shear
• Cracks, wear, loss, etc.
• Corresponding the jaw movements and the rotating direction with the appropriate actuating switch in the carrier’s cab
• Smooth opening and closing of the jaws
• Smooth rotating of the steel shear
• No abnormal sound and no vibration during the operation
Greasing
• Recommended greasing Interval: Every 2 hours
• 4 ~ 5 strokes from a grease gun to each greasing nipples are sufficient in each case
• Adapt greasing interval and amount of grease to working conditions
• Insufficient greasing may cause abnormal wear of the joint pin or slewing bearing
• Grease with the following properties are recommended:
• Recommended grease
Operation
Correct Working Method
Do Shearing from the Top Downwards.
Do not Operate to Either Side of the Carrier with the Boom and Arm Extended.
Make Sure the Strength of Structure which Support the Carrier.
Ensure Position of the Carrier.
Do not Use for Transport Purposes.
Do not Operate with the Carrier’s Hydraulic Cylinders Fully Extended or Retracted.
Do not Support the Carrier with the Steel Shear.
Do not Move an Object with the Steel Shear.
Advance the Working Position in Small Distance.
Never Use as a Hammer.
Never Use as a Lever.
Do not Move the Carrier while Shearing is in Progress
Never Pull at Heavy Elements
Do not Rotate the Steel Shear while Shearing is in Progress
• Underwater use
• Cutting high temperature object
• Bitting off ladle slag in iron works
Steel Cutting
Inspection and Maintenance
General Information
• Check, whenever inspecting, if there is a crack at the welded part of the steel shear (visual inspection).
• Check, whenever inspecting, the wear and rounding of the jaws, cutter blades and teeth. Change worn blades and teeth in good time.
• Check, whenever inspecting, if there are oil leaks at the hydraulic components or the hydraulic connections of the steel shear.
• Check, whenever inspecting, if all fasteners such as bolts, nuts and snap-rings come loose, and retighten them to the prescribed tightening torque, if necessary. Broken parts must be replaced immediately. Refer to chapter, “Tightening Torques” fo…
• Check that the blade clearances. The blade clearance should not exceed 2 mm. For steel cutting, the maximum blade clearance is 1 mm. Refer to chapter, “Changing the Cutter Blades” for detail information. Adjust the clearance of cutter blade accor…
• The hydraulic components of the steel shear – such as hydraulic cylinders, speed-up valve, rotation motor, etc. – are precision made hydraulic elements. These parts are strongly recommended to maintain by authorized DEVELON service.
• Absolute cleanliness and great care are basic and essential matters in handling of any hydraulic components. Dirt is the worst enemy in hydraulic system.
• Sealing components such as packing, o-rings and plugs in the hydraulic system should be oiled with very clean oil before assembly.
Maintenance Intervals
Every 2 Hours
• Grease the joint pins.
Daily
• Retighten loose components. Especially:
• Check the wear or breakage of the cutter blades.
• Check if the hydraulic connection become loose.
Weekly
• Check the wear of the jaws and steel shear body.
• Check carefully if there is a crack in the welded part of the steel shear.
• Check the hydraulic components of the carrier.
• Check abnormal sound or vibration during the jaw movements and rotation of the steel shear.
Every 1,000 Hours, or Yearly
Changing the Cutter Blades
• Always wear the eye protective glasses and use a plastic or copper hammer when removing and inserting the cutter blades. Because the cutter blades are made of very hard material, the metal chips may fly off to eye and cause serious injury if they…
• Use only HD HYUNDAI INFRACORE genuine fixing bolts and lock-washers. Ensure that they are tightened correctly to the prescribed tightening torque.
• If the condition of the bolts and lock-washers is not good, always use new bolts and lock-washers when fitting new cutter blades.
• Make sure there is no particle at the contact surface between the jaw and blades. Cutter blades must contact the jaw completely.
Adjustment of the Cutter Blade Clearance
• Close the jaws of the steel shear.
• Measure cutter blade clearance using a feeler gauge
• If clearance is greater than the specified maximum clearance, adjust the blade clearance according to the following procedures.
• Permissible maximum blade clearance is: 1 mm
• Blade clearance of 0.1 ~ 0.25 mm is recommended to be achieved after adjustment.
Principle of Jaw Clearance Adjusting
• This product has a structure in which adjusting the blade clearance with the shims arranged on both sides of the main body.
• When the shim (2) is removed from the front side of the main pin cover and fit it into the main pin cover from the opposite side (rear side) of the main pin cover (the front side is defined as the side facing the main body), the jaw moves toward …
• When shim (3) is removed from the rear side of the main pin cover and fit into the main pin cover from the opposite side (front side) of the main pin cover, the blade clearance is widened. If the blade of the jaw and the main body overlaps each o…
• To secure the normal operation without causing damage to the jaw, narrow the clearance between the shim and the main pin cover, which are facing each other, as closely as possible. Do not fasten the shim and the main pin cover loosely. Check the …
Process of Jaw Clearance Adjusting
• The jaw moves toward the clearance adjusting shim (3) which touches the main pin cover (5) of the main body (1). (Figure 2)
• To check the clearance, open the jaws properly in the way they overlaps each other fix the cutter on the ground, as shown in Figure 2.
• Remove the fixed bolt (10) and the spring washer (8), and then remove the stopper (7) on the pin nut (6).
• Using the jig for pin nut (6) and ring wrench in the tool kit, unfasten the pin nut [6) from the main pin by turning it counterclockwise.
• Unfasten the fixed bolt (9) and spring washer (8) and remove the main pin cover (5) from the main body [1).
• Remove shim (3) on the same side as blade and fit it into the cover from the side opposite to the blade. Then jaw (2) will move toward the blade of the main body (1) by the thickness of the shim (3).
• Disassembling stopper (7), pin nut (6), main pin cover (5) that are used to assembling the shim (4) can be conducted in the same way to remove the shim (3)
• After moving the shim (3), assemble the stopper (7), pin nut (6), and main pin cover (5) in the reverse order of disassembly.
• When the assembling is completed, move the jaw (2) slowly checking the blade clearance.
• When the clearance is made appropriate, apply grease sufficiently.
• When the blade clearance is wide: Figure 2 (Narrow the clearance between the fixed jaw and the moving jaw)
• When the blades overlap each other: Figure 3 (Widen the clearance between the fixed jaw and the moving jaw)
Tightening Torques
Welding Guide for the Jaws and Teeth
Hydraulic Oil
• Stiff operation of the speed-up valve
• Risk of cavitation in the pumps and hydraulic motor
• Bypassing the filter, impurities in oil not filtered
• Efficiency losses (internal leaks)
• Damage to seals and oil leaks
• Accelerated wear in moving parts due to insufficient lubrication
• The viscosity range in the special oil must be in the given range (15 ~ 1,000 cSt at any ambient temperature)
• The lubrication properties must be good enough
• The corrosion resistance properties must be good enough
• The oil filter must allow maximum particle size of 25 microns (0.025 mm).
• The oil filter material must be fiber cloth or very fine metallic mesh to withstand pressure fluctuations.
• The oil filter must have a volume flow capacity of at least twice the steel shear’s maximum flow
• The working life of the hydraulic elements is significantly shortened
• Valves do not function properly due to spool stick
• Wear of cylinder rod and seals
• Shortened working life and reduced efficiency of hydraulic oil (overheats of oil, deteriorates of oil quality, electro- chemical changes in hydraulic oil)
Dismounting and Storing the Steel Shear
• When dismounting the hydraulic steel shear from the carrier, put the steel shear on the firm and flat groud after check if there is no obstacle within the swing area of the carrier.
• Also the jaw of the steel shear must be kept completely close.
• Take care of the safety against the steel shear after dismounting so that it can’t fall over.
• After turn stop valves to “OFF” position, disconnect hydraulic hoses from the stop valves.
• Apply end caps and plugs to hoses and stop valves to prevent contamination.
• The hydraulic steel shear recommended to be deposited for storage on a wooden support of sufficient size and strength.
• Also the jaw of the steel shear must be kept completely close.
• Collect any oil which runs out when the hydraulic hoses are disconnected and dispose of it correctly.


