The Komatsu PC3000-11 Mining Excavator is a large mining shovel used for overburden removal, production loading, and round-the-clock pit work. People who reach for the Komatsu PC3000-11 Mining Excavator Shop Manual (GZEBM06373-UP) are usually shop mechanics, senior techs, or fleet supervisors planning heavy repairs and long-term uptime. They’re trying to cut guesswork, keep parts ordered ahead of failures, and get the machine back in the cut on schedule.
What this manual helps you do
- Trace hydraulic, electrical, and control-system faults using the kind of diagnostic flows and schematics most shops expect in a factory shop manual.
- Check removal and installation sequences for major components so you can plan crane time, tooling, and labor before you shut a unit down.
- Follow step-by-step disassembly and reassembly procedures for key systems like the diesel engine, swing, travel, and working equipment.
- Diagnose recurring issues (overheating, slow cycles, intermittent electrical faults) in a structured way instead of trial-and-error parts swapping.
- Verify inspection points and adjustment procedures so your rebuilds and mid-life overhauls line up with Komatsu workshop standards.
The Komatsu PC3000-11 Mining Excavator Shop Manual walks through diagnostic procedures, disassembly sequences, and workshop checks used during heavy repairs. In my experience, this is the book you want open when the machine is down and you’ve got a crew and a crane on the clock.
Who this is for
This fits field techs, shop mechanics, and fleet managers who schedule and supervise major repairs. If you mainly need daily/weekly service intervals or basic operation info, you’d be better off with the Operation & Maintenance style manual instead.
FAQ
Q: Is this a PDF I can search and print?
A: Yes, it’s provided as a PDF you can search by keyword and print selected pages for shop use.
Q: Is this overkill if I’m just doing routine services?
A: For basic greasing and interval services, it’s more detail than you need; it’s aimed at workshop-level troubleshooting and repair.
Q: How do I know it matches my exact PC3000-11?
A: Check your machine’s model designation and match it to PC3000-11; for any serial number-specific questions, confirm with your Komatsu dealer before buying.
Bottom line: if you’re planning or executing component-level repairs on PC3000-11 units, this is the right manual; if you only handle light maintenance and operation, keep looking for the O&M book instead.
📘 Show Index
Table of Contents:
- Shop Manual Cover
- 00 Foreword and Safety
- 1 Foreword
- 1.1 BEFORE READING THIS MANUAL
- 1.2 CONTENTS OF THIS BINDER
- 1.2.1 Contacting the Service
- 1.2.2 Guarantee
- 1.3 DIVISION OF THE BINDER
- Safety
- 2.1 SAFETY INFORMATION
- 2.2 OVERVIEW
- 2.2.1 NORMAL OPERATIONS
- 2.2.2 REGULAR MAINTENANCE
- 2.2.3 TROUBLESHOOTING, ADJUSTMENTS AND REPAIR
- 2.2.4 ADDITIONAL SAFETY PRECAUTIONS
- 2.3 SOUND PRESSURE AND VIBRATION LEVELS IN THE OPERATOR’S CAB.
- 2.3.1 SOUND
- 2.3.2 VIBRATION
- 2.4 GENERAL PRECAUTIONS COMMON TO OPERATION ON THE EXCAVATOR
- 2.4.1 UNDERSTANDING THE excavator
- 2.4.2 PRECAUTIONS BEFORE STARTING OPERATION ON THE EXCAVATOR
- 2.4.2.1 ENSURING SAFE OPERATION
- 2.4.3 PREPARATIONS FOR SAFE OPERATION
- 2.4.3.1 PRECAUTIONS REGARDING SAFETY RELATED EQUIPMENT
- 2.4.3.2 INSPECTING THE excavator
- 2.4.3.3 WEAR WELL FITTING CLOTHES AND PROTECTIVE EQUIPMENT
- 2.4.3.4 KEEP excavator CLEAN
- 2.4.3.5 PRECAUTIONS INSIDE OPERATOR’S COMPARTMENT
- 2.4.3.6 PROVIDE FIRE EXTINGUISHER AND FIRST AID KIT
- 2.4.3.7 IF A PROBLEM IS FOUND
- 2.4.4 FIRE PREVENTION
- 2.4.4.1 PRECAUTIONS TO PREVENT FIRE
- 2.4.4.2 ACTION IF FIRE OCCURS ON PC3000
- 2.4.4.3 ACTION IF FIRE OCCURS ON PC4000, PC5500, PC7000, PC8000
- 2.4.4.4 EMERGENCY EXIT FROM OPERATOR’S CAB
- 2.4.5 PRECAUTIONS WHEN GETTING ON OR OFF THE EXCAVATOR
- 2.4.5.1 USE HANDRAILS AND STEPS WHEN GETTING ON OR OFF THE excavator
- 2.4.5.2 NO JUMPING ON OR OFF THE excavator
- 2.4.5.3 NO PEOPLE ON THE ATTACHMENT
- 2.4.5.4 WORKING IN HIGH PLACES
- 2.4.5.5 LEAVING OPERATOR’S SEAT WITH LOCK
- 2.4.5.6 LEAVING THE excavator
- 2.4.6 BURN PREVENTION
- 2.4.6.1 Hot coolant
- 2.4.6.2 Hot oil
- 2.4.7 PRECAUTIONS WHEN CLEANING CAB GLASS
- 2.4.8 PRECAUTIONS RELATED TO PROTECTIVE STRUCTURES
- 2.4.9 PRECAUTIONS RELATED TO AIRBOURNE AND EJECTED DEBRIS
- 2.4.9.1 UNAUTHORIZED MODIFICATION
- 2.4.9.2 PRECAUTIONS RELATED TO ATTACHMENTS AND OPTIONS
- 2.4.10 ELECTROMAGNETIC COMPATIBILITY (EMC)
- 2.4.11 PRECAUTIONS AT JOBSITE
- 2.4.11.1 VISIBILITY FROM OPERATOR’S SEAT
- 2.4.11.2 CAMERA SYSTEM WITH MONITORS
- 2.4.11.3 ENSURE GOOD VISIBILITY
- 2.4.11.4 CHECKING SIGNS AND SIGNALMAN’S SIGNALS
- 2.4.11.5 INVESTIGATE AND CONFIRM JOBSITE CONDITIONS
- 2.4.11.6 DO NOT GO CLOSE TO HIGH VOLTAGE CABLES
- 2.4.11.7 Lightning Strikes
- 2.4.11.8 WORKING ON LOOSE GROUND
- 2.4.11.9 GAS, DUST, STEAM, SMOKE AND EXHAUST FUMES
- 2.4.11.10 VENTILATION OF ENCLOSED AREAS
- 2.4.12 STARTING motor
- 2.4.12.1 WARNING TAG
- 2.4.12.2 CHECKS BEFORE STARTING motor
- 2.4.12.3 PRECAUTION WHEN STARTING motor
- 2.4.12.4 PRECAUTION IN COLD AREAS
- 2.4.13 OPERATION
- 2.4.13.1 CHECKS BEFORE OPERATION
- 2.4.13.2 PRECAUTIONS WHEN TRAVELING IN FORWARD OR REVERSE
- 2.4.13.3 PRECAUTIONS WHEN traveling
- 2.4.13.4 TRAVELING ON SLOPES
- 2.4.13.5 OPERATIONS ON SLOPES
- 2.4.13.6 PROHIBITED OPERATIONS
- 2.4.13.7 TRAVELING ON FROZEN OR SNOW COVERED SURFACES
- 2.4.13.8 PARKING THE excavator
- 2.4.13.9 TRANSPORTATION
- 2.5 PRECAUTION FOR MAINTENANCE
- 2.5.1 GENERAL PRECAUTIONS
- 2.5.1.1 SELECTION AND QUALIFICATION OF PERSONNEL – BASIC RESPONSIBILITIES
- 2.5.1.2 STOP motor FOR MAINTENANCE
- 2.5.1.3 WARNING TAG
- 2.5.1.4 Maintenance safety Switch
- 2.5.1.5 KEEP WORKPLACE CLEAN AND TIDY
- 2.5.1.6 APPOINT LEADER WHEN WORKING WITH OTHERS
- 2.5.1.7 TWO WORKERS FOR MAINTENANCE WHEN THE excavator IS RUNNING
- 2.5.1.8 INSTALLING, REMOVING OR STORING ATTACHMENTS
- 2.5.1.9 PRECAUTIONS WHEN WORKING UNDER THE excavator OR EQUIPMENT
- 2.5.1.10 NOISE
- 2.5.1.11 WHEN USING A HAMMER
- 2.5.1.12 PROPER TOOLS
- 2.5.1.13 ACCUMULATOR
- 2.5.1.14 PERSONNEL
- 2.5.2 PRECAUTIONS FOR INSPECTION AND MAINTENANCE
- 2.5.2.1 PRECAUTION WHEN WELDING
- 2.5.2.2 BATTERY HANDLING
- 2.5.3 PRECAUTIONS WITH HIGH PRESSURE FLUID
- 2.5.3.1 PRECAUTIONS WITH HIGH FUEL PRESSURE
- 2.5.3.2 HANDLING HIGH PRESSURES HOSES OR PIPES
- 2.5.3.3 REPLACEMENT OF HOSE LINES
- 2.5.3.4 INSPECTION OF HOSE LINES
- 2.5.3.5 PERIODIC REPLACEMENT OF SAFETY CRITICAL PARTS
- 2.5.3.6 PRECAUTIONS FOR HIGH VOLTAGE
- 2.5.3.7 AIR CONDITIONING MAINTENANCE
- 2.5.3.8 COMPRESSED AIR
- 2.5.3.9 WASTE MATERIALS
- 2.6 ADDITIONAL SAFETY INFORMATION FOR TROUBLESHOOTING AND ADJUSTMENTS
- 2.6.1 INSPECTION OF THE HYDRAULIC SYSTEM
- 2.6.2 TWO WORKERS ONLY WHEN THE EXCAVATOR IS RUNNING DURING ADJUSTMENTS
- 2.6.3 AREAS OF POTENTIAL DANGER AROUND THE EXCAVATOR
- 2.7 SPECIAL SAFETY EQUIPMENT
- 2.7.1 FRONT GUARD PROTECTIVE STRUCTURE ’FOPS’ FOR OPERATOR’S CAB
- 2.7.2 OBJECT HANDLING
- 2.7.3 LIGHTING
- 2.7.4 WARNING BEACON
- 2.7.5 SAFETY HARNESS IN CONFORMITY WITH EN 361 (EUROPEAN STANDARD)
- 2.7.5.1 SAFETY HARNESS IN CONFORMITY WITH EN 361 (EUROPEAN STANDARD)
- 2.7.5.2 INSTRUCTIONS FOR USE
- 2.7.5.3 RECOMMENDATIONS FOR USE OF THE HOLDING HOOKS AND HOLD- BACK HOOKS OF THE SAFETY HARNESS
- 2.7.5.4 INSTRUCTIONS FOR USE
- 01 Specification
- 10 Structure and Function
- Table of Contents
- 1 Introduction
- 1.1 Foreword
- 1.2 Recommendations for environmentally friendly operation and maintenance of hydraulic mining shovels
- 1.3 Explanation of abbreviations
- 1.4 Diagrams and illustrations in this manual
- 2 Specifications
- 2.1 Fluids and lubricants
- 2.2 Lifting Gears
- 2.3 Safety hints for sling accessory
- 2.4 Standard Tightening Torque Chart
- 2.4.1 Metric standard thread
- 2.4.2 Metric fine thread
- 2.4.3 Cummins motor torques – Metric
- 2.4.4 Cummins motor torques – U.S. customary
- 2.5 Conversion Tables
- 2.5.1 Method of using the conversation table
- 2.5.2 Millimeter – inch and kilogram – pound
- 2.5.3 Liter to U.S. gallon and liter – U.K. gallon
- 2.5.4 Nm – ft.lb
- 2.5.5 Bar – PSI – kPa – MPa
- 2.5.6 Temperature
- 2.6 PT100 temperature charts (PT100) g Centigrade – Ohm
- 2.7 Blind plugs
- 2.7.1 Dummy plates for hydraulic-flanges
- 2.7.2 Classification of threads to the nominal width
- 2.7.3 Plugs and fittings according to ISO 8434-1 / DIN 2353
- 3 Main assembly groups
- 3.1 General layout
- 3.2 Superstructure
- 3.3 Machinery house
- 3.3.1 Machinery house roof
- 3.4 Hydraulic oil tank
- 3.5 Hydraulic oil cooler
- 3.6 Fuel tank
- 3.7 Counterweight
- 3.8 Cab base
- 3.9 Operator’s cab
- 3.9.1 HYDRAULIC CONTROL SYSTEM – CONTROL PATTERN
- 3.9.2 SAFETY CIRCUIT FOR CONTROLS
- 3.9.3 ANTENNA AND LIGHTING TRAVERSE OF THE CABIN
- 3.10 Main Control blocks
- 3.10.1 Main control blocks (FSA)
- 3.10.2 Main control blocks (BHA)
- 3.11 Slew Gear
- 3.11.1 Slew Gear Type 2063
- 3.11.2 Slew Gear type 632770
- 3.12 Undercarriage
- 3.13 Backhoe attachment (BHA)
- 3.14 Front shovel attachment (FSA)
- 3.15 Safety circuit PPC control
- 3.15.1 Safety circuit – Refilling arm
- 3.15.2 Safety circuit – Ladder
- 3.15.3 Safety circuit – Lock lever
- 3.16 KomVision camera system
- 3.17 PLM (Payload Management)
- 4 Drive
- 4.1 Prime drive assembly
- 4.2 Engine mounts
- 4.3 Flexible coupling
- 4.3.1 Information for maintenance
- 4.3.2 Coupling elements
- 4.3.3 Separation and assembly of the coupling inner and outer part
- 4.3.4 Operation troubles, causes, and rectification
- 4.4 Exhaust gas aftertreatment (T4 final)
- 4.4.1 DEF system layout
- 4.4.2 DEF tank – Location and overview
- 4.4.3 Dosing pumps at DEF tank
- 4.4.4 Coolant supply for DEF tank heating circuit
- 4.4.5 Information on DEF (Diesel exhaust fluid)
- 4.4.5.1 DEF refilling line
- 4.4.5.2 DEF maintenance information
- 4.4.5.3 Notes on DEF quality and temperature – Important
- 4.4.5.4 DEF storage
- 4.4.5.5 Common names used for DEF
- 4.4.6 DEF tank level
- 4.4.7 SCR catalyst for exhaust gas Aftertreatment
- 4.4.8 Wiring between engine – DEF tank – SCR catalyst
- 4.5 Fuel cooling (T4 equipment)
- 4.6 Radiator assembly and fan drive
- 4.6.1 Radiator assembly
- 4.6.1.1 Hydraulic schematic of radiator fan drive
- 4.6.2 Fan pump drive type HPV140
- 4.6.3 Radiator fan speed testing and adjustment
- 4.6.3.1 Testing & readjustment procedure
- 4.6.3.2 Basic adjustment procedure
- 4.7 Pump distributor gearbox (PTO)
- 4.7.1 PTO lubrication and cooling
- 4.7.2 Pump spline lubrication
- 4.7.2.1 Oil level in the main pump and gear oil pump drive shaft housing
- 4.7.2.2 Checks and adjustments – PTO lubrication pressure
- 4.8 Hydraulic pumps – arrangement
- 4.9 Air filter
- 5 Hydraulic oil tank
- 5.1 General layout
- 5.2 Hydraulic oil tank, location of the electric equipment
- 5.3 Suction oil manifold with strainers
- 5.4 Return oil collector manifold with strainer
- 5.5 Back pressure valve
- 5.6 Transfer pump
- 5.7 Return and leak oil filter
- 5.8 Breather filter
- 6 Hydraulic oil cooling
- 6.1 Overall view of the hydraulic oil cooling
- 6.2 Function of the hydraulic oil cooling circuit
- 6.3 Adjustment of the back pressure valve
- 6.4 Stepless cooler fan rpm control
- 6.5 Pressure limiting valve
- 6.5.1 Components of the fan drive circuits
- 6.6 Fan pump drive type HPV140
- 6.7 Oil cooler fan speed testing/Adjustment
- 6.7.1 Adjustment procedures for radiator fan speed
- 6.7.1.1 General information – Testing
- 6.7.1.2 Basic adjustment procedure
- 7 Controlling
- 7.1 General layout
- 7.2 Control and filter plate – location of components
- 7.3 Pilot control frame – location of components
- 7.4 Pilot pressure supply and adjustments
- 7.4.1 Pilot pressure circuit
- 7.4.2 Checks and adjustment of pilot pressure
- 8 Components
- 8.1 Main control blocks and high pressure filters (FSA)
- 8.2 Main control blocks and high pressure Screens (BHA)
- 8.3 Distributor manifold – location of restrictor blocks and anti cavitation valves (FSA)
- 8.4 Distributor manifold – location of restrictor blocks and anti cavitation valves (BHA)
- 8.5 Single control blocks (floating) for stick and boom (FSA)
- 8.6 Restrictor block with secondary relief valve
- 8.7 Anti-cavitation valve (ACV) block
- 8.8 High-pressure screen
- 8.9 Control blocks and valves
- 8.9.1 Spool types
- 8.9.2 MRV, SRV and ACV
- 8.9.3 Load holding valve
- 8.10 Travel brake valve
- 8.11 4/2 Directional solenoid valves
- 8.12 4/3 Directional solenoid valves
- 8.13 Pressure double stage valve
- 8.14 Hydraulic cylinder
- 8.14.1 with NOK-3 sealing
- 8.14.2 With dual stacked sealing
- 8.14.3 Cylinder data markings
- 8.15 Auxiliary gear pumps
- 9 Main hydraulic pumps and pump regulation
- 9.1 General
- 9.1.1 Pump locations and pump data
- 9.2 Main pumps
- 9.2.1 Hydraulic pump type HPV375+375
- 9.2.1.1 Main pump sectional drawings
- 9.2.2 Servo valve
- 9.2.2.1 VC valve servo piston
- 9.2.2.2 EPC valve
- 9.3 Electronic pump regulation system
- 9.3.1 Cut-off function
- 9.3.2 Slew control (volume reduction)
- 9.3.3 Temperature control
- 9.3.3.1 Hydraulic oil temperature charts
- 9.4 Pump and valve controller CR730
- 9.5 Monitoring, error indication, adjustment
- 9.5.1 Monitoring items of the pump controller
- 9.5.2 Error indication of the pump controller
- 9.5.3 Adjustable parameters of the pump controller
- 9.5.3.1 Description of the Primary P-Factor
- 9.5.4 Pump sol ’min’ current values according to pump type plate
- 9.5.5 Pump sol ’max’ current values according to pump type plate
- 9.6 Checks and adjustments
- 9.6.1 Engine power check
- 9.6.2 Cut-off function check
- 9.6.2.1 Cut-off for clam close (FSA only)
- 9.7 Engine speed sensor (pick-up)
- 9.7.1 General
- 9.7.2 Engine speed sensor (pick-up) adjustment
- 9.7.3 In case of problems – When correct speed sensor Adjustment is guaranteed
- 10 Operating hydraulics
- 10.1 General
- 10.1.1 Floating system (FSA)
- 10.2 Checks and adjustments of the main relief valve (MRV)
- 10.3 Hydraulics for the attachment cylinders
- 10.3.1 Checks and adjustments of the secondary relief valves (SRV)
- 10.3.1.1 Boom cylinders, piston side (BHA and FSA), boom up
- 10.3.1.2 Boom Cylinder, Piston Rod Side (BHA and FSA), boom down
- 10.3.1.3 Stick cylinders, piston side (FSA), stick out
- 10.3.1.4 Stick cylinders, piston side (BHA), stick in
- 10.3.1.5 Stick cylinders, piston rod side (FSA), stick in
- 10.3.1.6 Stick cylinders, piston rod side (BHA), stick out
- 10.3.1.7 Bucket cylinders, piston side (FSA), bucket fill
- 10.3.1.8 Bucket cylinders, piston side (BHA), bucket fill
- 10.3.1.9 Bucket cylinders, piston rod side (FSA), bucket dump
- 10.3.1.10 Bucket cylinders, piston rod side (BHA), bucket dump
- 10.3.1.11 Clam cylinders, piston rod side (FSA), clam open
- 10.3.1.12 Clam cylinders, piston side (FSA), clam close
- 10.3.2 Checks and adjustments of the lowering speed
- 10.3.2.1 Checks and adjustments of the lowering speed – boom (FSA)
- 10.3.2.2 Checks and adjustments of the lowering speed – boom (BHA)
- 10.3.2.3 Checks and adjustments of the lowering speed – stick (FSA)
- 10.3.2.4 Checks and adjustments of the lowering speed – stick (BHA)
- 10.3.2.5 Checks and adjustments of the lowering speed – bucket (FSA)
- 10.3.2.6 Checks and adjustments of the lowering speed – bucket (BHA)
- 10.3.2.7 Checks and adjustments of the lowering speed – clam (FSA)
- 10.4 Hydraulics for the slew circuit
- 10.4.1 Slew circuit
- 10.4.2 Slew motor
- 10.4.3 Slew gearbox of type 2063
- 10.4.4 Slew gearbox of type 632770
- 10.4.5 Slew parking brake of type 2063
- 10.4.6 Slew parking brake of type 632770
- 10.4.7 Slew brake valve
- 10.4.8 Checks and adjustments for the slew circuit
- 10.4.8.1 Checks and adjustments, double stage valve
- 10.4.8.2 checks and adjustments, slew Brake pilot pressure
- 10.4.8.3 Cycle time inspection slew
- 10.4.8.4 Slew brake performance test
- 10.4.9 Function check for the hydraulic slew brake
- 10.5 Hydraulics for the travel circuit
- 10.5.1 Travel circuit
- 10.5.2 Travel motor
- 10.5.3 Rotary joint
- 10.5.4 Travel gearbox
- 10.5.5 Travel parking brake
- 10.5.5.1 Travel parking brake
- 10.6 Travel brake valve
- 10.6.1 Checks and adjustments
- 10.6.1.1 Checks and adjustments for the travel circuit
- 10.6.1.2 Function check for the travel parking brake
- 11 Hydraulic track tensioning system
- 11.1 General
- 11.2 Functional description
- 11.3 Double stage valve
- 11.4 Tensioning cylinder
- 11.5 Adjustments / checks
- 12 Access stairway, hydraulically operated
- 12.1 General
- 12.2 Function of the hydraulically operated access stairway
- 12.3 Adjustments / checks
- 13 Central refilling system (refilling arm)
- 13.1 Refilling arm location
- 13.2 Function
- 14 Hints for reading the hydraulic diagram
- 14.1 General
- 14.2 Hydraulic symbols
- 14.2.1 Lines, unions
- 14.2.2 Components, valves
- 14.2.3 Sensors
- 14.2.4 Valves, valve components
- 14.2.5 Pump, motor, cylinder
- 15 Hints for reading the electric Wiring Diagram
- 15.1 General
- 15.2 Reference code of the electrical components
- 15.2.1 Area code
- 15.2.2 Component identifying letter
- 15.3 Graphical symbols
- 15.4 Concept of the Wiring Diagram
- 15.4.1 Cover page of the Komatsu W/D
- 15.4.2 Example 1 from the schematics in the W/D
- 15.4.3 Example 2 from the schematics in the W/D
- 15.4.4 Table of contents in the W/D (page 1 of 2)
- 15.4.5 Location list
- 15.4.6 Cross reference list for electr. components in the W/D
- 15.4.7 Cross reference list for terminals in the W/D
- 15.4.8 Cross reference list for connectors in the W/D
- 15.4.9 Cross reference list for terminal boards in the W/D
- 15.4.10 Connection table
- 15.5 Cable and connector marking
- 15.6 Cable color identification
- 16 Monitoring and Control system
- 16.1 Controller system overview
- 16.1.1 location of KOMTRAX Plus components in cab base
- 16.2 System layout
- 16.2.1 CAN BUS #0 overview
- 16.2.2 CAN BUS #1 overview
- 16.2.3 CAN BUS #2 overview
- 16.3 Interface connection
- 16.3.1 General description
- 16.4 K+ monitor – Operator level
- 16.5 Main gauge screens
- 16.6 Operator menus
- 16.6.1 Operator menu → ECO Guidance – Operation Records
- 16.6.2 Operator menu → ECO Guidance – Average Fuel Consumption Logs
- 16.6.3 Operator menu → Machine Setting
- 16.6.4 Operator menu → Aftertreatment cleaning
- 16.6.4.1 Introduction
- 16.6.4.2 Operator menu: SCR Information
- 16.6.5 Operator menu → Maintenance
- 16.6.5.1 Reset of ’remaining time’ till next maintenance interval
- 16.6.5.2 Usage limitation
- 16.6.6 Operator menu → Monitor Setting – Screen Adjustment
- 16.6.7 Operator menu → Monitor Setting – Clock Adjustment – Calender
- 16.6.8 Operator menu → Monitor Setting – Clock Adjustment – Time
- 16.6.9 Operator menu → Monitor Setting – Clock Adjustment – 12h/24h Mode
- 16.6.10 Operator menu → Monitor Setting – Clock Adjustment – Daylight Saving Time
- 16.6.11 Operator menu → Monitor Setting – Language
- 16.7 Status indication and errors on the operator level
- 16.7.1 Prompts (status indication)
- 16.7.2 Cautions
- 16.7.3 Emergency shutdown screen
- 16.7.4 Fault levels for error messages
- 16.7.5 Action code level L01
- 16.7.6 Action code level L02
- 16.7.7 Action code level L03
- 16.7.8 Action code level L04
- 16.7.9 Error list
- 16.8 Table of failure codes
- 16.8.1 Table of failure codes for Mechanical Systems PC3000-11 T4
- 16.8.2 Table of failure codes for Electrical Systems PC3000-11 T4
- 16.8.3 Failure codes without monitor indication
- 16.8.4 Additional text information for action codes
- 16.9 Table of C-codes – Diesel engine QSK38 T4
- 16.10 Flow charts of K+ monitor screens
- 16.10.1 Flow chart service level
- 16.11 K+ monitor
- 16.11.1 Entering the Service Level
- 16.11.2 Key symbols (F1…F6) on the Service Level
- 16.11.3 Service Menu selection screens
- 16.12 Service Menu – item 01 Monitoring / Custom
- 16.12.1 Monitoring list for: ENG controller
- 16.12.2 Monitoring list for: PUMP controller
- 16.12.3 Monitoring list for: VALVE0 controller
- 16.12.4 Monitoring list for: MON (monitor)
- 16.12.5 Monitoring list for: KOM PLS (K+ controller)
- 16.12.6 How to perform the monitoring function
- 16.13 Service Menu – item 02 PM Clinic
- 16.13.1 PM Clinic (General)
- 16.13.2 PM Clinic (Power Check)
- 16.13.3 Functions of PM CLINIC (Power check)
- 16.14 Service Menu – item 03 Abnormality record
- 16.14.1 Reset error messages
- 16.15 Service Menu – item 04 Maintenance record
- 16.16 Service Menu – item 05 Maintenance Mode Setting
- 16.17 Service Menu – item 06 Snap Shot
- 16.18 Service Menu – item 07 Phone Number Entry
- 16.19 Service Menu – item 08 Default
- 16.20 Service Menu – item 09 Unit
- 16.21 Service Menu – item 10 Adjustment
- 16.21.1 Adjustments for: PUMP controller
- 16.21.2 Pump sol ’min’ current values according to pump type plate
- 16.21.3 Pump sol ’max’ current values according to pump type plate
- 16.21.4 Adjustments for: MON (Monitor)
- 16.21.4.1 Using the Idling Stop Timer
- 16.22 Service Menu – item 11 Machine Configuration
- 16.22.1 Details of Machine Configuration for PC3000-11 T4
- 16.22.2 Changing lever control from EURO to KMG
- 16.22.3 Changing attachment type from FSA to BHA
- 16.22.4 In case of problems during changing procedure for lever control or attachment type (OPTIONAL)
- 16.22.5 Hydraulic Oil and PTO Gear Oil Definition Tables
- 16.22.5.1 Hydraulic oil temperature charts
- 16.22.5.2 PTO gear oil temperature charts
- 16.22.6 Idling Stop Timer
- 16.23 KOMTRAX Plus controller (UM600)
- 16.24 CR730 controller
- 16.24.1 Location of CR730 controllers and K+
- 16.25 Controller replacement procedure
- 16.25.1 Sequence of the controller replacement procedure
- 16.25.2 After controller replacement
- 17 Lubrication system
- 17.1 General overview (SLS and CLS)
- 17.1.1 General description
- 17.2 Basic function of the lubrication systems
- 17.3 Lubrication systems (SLS / CLS)
- 17.3.1 Lubrication pump station
- 17.3.2 General Information on CLS
- 17.3.3 General information on SLS
- 17.3.4 Manual lube activation
- 17.4 Lubrication cycle
- 17.4.1 Operation and control
- 17.4.2 Lubrication cycle – processing
- 17.4.3 Time segments and switch points of a lubrication cycle
- 17.4.4 Lubrication modes
- 17.4.4.1 Automatic lubrication mode
- 17.4.4.2 Manual lubrication mode
- 17.4.4.3 Reduced pause time for service
- 17.5 Hydraulically driven lube pump
- 17.5.1 Adjustment of lube pump speed
- 17.5.1.1 Stroke speed adjustment
- 17.5.1.2 Working pressure
- 17.6 Lubricant injectors
- 17.6.1 Tightening torques for fittings at grease injectors
- 17.6.2 Description
- 17.6.3 Adjustment of the lubricant output
- 17.6.4 Operation principle of lubricant injectors
- 17.6.4.1 Function description
- 17.6.5 Connection of one or more injectors
- 17.7 Vent valve and grease outlet filter
- 17.7.1 Vent valve description
- 17.8 End-line switch
- 17.8.1 Description
- 17.8.2 CLS and SLS end-line switch adjustment
- 17.9 Lubricant level sensors
- 17.10 Commissioning
- 17.10.1 Commissioning of the CLS 1 lubrication system
- 17.10.2 Fine adjustment
- 17.10.3 Commissioning of the SLS lubrication system
- 18 Air conditioner
- 18.1 Large A/C Systems on Hydraulic Mining Excavators
- 18.2 Working on A/C systems
- 18.2.1 Refrigerant Recovery
- 18.2.2 Compressor oil procedures
- 18.3 Maintenance & preventive maintenance of A/C systems
- 18.4 Commissioning of A/C systems
- 18.5 Compressor oil – Lubrication chart
- 18.6 Standard Air Conditioning System Diesel Drive
- 18.6.1 A/C compressor type TM-16
- 18.6.2 A/C compressor type TM-21
- 18.6.3 Principle diagram of an electromagnetic clutch
- 18.6.4 Filter-drier
- 18.7 Air conditioner unit at operator’s cab
- 18.7.1 Shut-Off valves at dryer cartridge
- 18.8 A/C control panel
- 18.8.1 Button layout
- 18.8.2 Display/LEDs
- 19 Deep temperature equipment (option)
- 19.1 General information
- 19.1.1 Introduction
- 19.1.2 Deep temperature components overview
- 19.1.3 Power supply preconditions for preheating
- 19.1.4 Power requirements for preheating systems
- 19.2 Preheating procedure
- 19.2.1 Global flow chart of the preheating procedure
- 19.2.2 Starting the preheating procedure
- 19.2.3 Preheating of operator’s cab and Diesel engine (coolant system)
- 19.2.4 Preheating of lubricants and superstructure (Diesel) (electric system)
- 19.3 Constant heating of travel motors (TTT equipment below -40°C only)
- 19.4 Component location examples
- 19.4.1 Electric heating elements for hydraulic and batteries [electric excavator]
- 19.4.2 Electric heating elements for hydraulics [Diesel excavator]
- 19.4.3 Electric heating elements for engines and batteries [Diesel excavator]
- 19.5 Components of TT equipment
- 19.5.1 Preheating components on a Diesel excavator
- 19.5.2 Preheating components on an electric excavator
- 19.5.3 Wiring Diagrams for preheating systems
- 19.5.3.1 Wiring diagram "Hydraulic Oil Tank Preheating" part 1 of 3
- 19.5.3.2 Wiring diagram "Hydraulic Oil Tank Preheating" part 2 of 3
- 19.5.3.3 Wiring diagram "Hydraulic Oil Tank Preheating" part 3 of 3
- 19.5.3.4 Wiring diagram "Suction Oil Manifold Preheating"
- 19.5.3.5 Wiring diagram "PTO Preheating"
- 19.5.3.6 Wiring diagram "Battery heater pads"
- 40 Troubleshooting
- Table of Contents
- 1 Introduction
- 1.1 Overview
- 1.1.1 General advice when using troubleshooting charts
- 1.2 General Precautions
- 1.2.1 Excavator park position during maintenance & repair
- 2 General information for troubleshooting
- 2.1 Preparations for work
- 2.2 Precautions During Work
- 2.3 Precautions when carrying out any operation
- 2.3.1 Precautions when carrying out removal work
- 2.3.2 Precautions when carrying out installation work
- 2.3.3 Precautions when completing the operation
- 2.4 Fundamental requirements for troubleshooting
- 2.4.1 Technical documentation
- 2.4.2 Tools
- 2.4.2.1 Reference Guide for Deutsch Removal Tools
- 2.4.3 Personnel
- 2.5 Points to remember when troubleshooting
- 2.6 Sequence of events in troubleshooting
- 2.7 Checks before troubleshooting
- 2.8 Handling of electric equipment and hydraulic components
- 2.8.1 Points to remember when handling electric equipment
- 2.8.2 Points To Remember When Handling Hydraulic Equipment
- 2.9 General working procedures
- 2.9.1 Air Bleeding of Various Hydraulic Parts
- 2.9.2 Air bleeding from the hydraulic pumps
- 2.9.3 Air bleeding from hydraulic cylinders
- 2.10 Cylinder bypass test
- 2.11 Basics about "How to crimp" (with strain relief)
- 2.11.1 Crimp tool & repair kit
- 2.11.2 General
- 2.11.3 Select the required connector components
- 2.11.4 Stripping a wire
- 2.11.5 Crimping
- 2.11.6 Connector assembly after crimping
- 2.12 Cable shielding
- 2.13 Relay checks
- 2.13.1 Switch contact testing using the Test button
- 2.13.2 Measuring of the coil resistance
- 3 Mounting locations and connector types
- 3.1 Component location
- 3.1.1 Superstructure
- 3.1.2 Location of battery box and emergency stop switches
- 3.1.3 Location of service safety switch
- 3.1.4 Engine – location of electrical components
- 3.1.5 Control and filter plate – location of Components
- 3.1.6 PTO, main pumps and suction oil tank – location of electrical components
- 3.1.7 Main control blocks – location of components
- 3.1.8 Lubrication system – location of electrical components
- 3.1.9 Cab base – location of electrical components
- 3.1.9.1 Pilot control frame – location of electrical components
- 3.1.10 Hydraulic Oil Tank – Location of Electrical Components
- 3.1.11 Hydraulic oil cooler – location of electrical components
- 3.1.12 Refilling arm – location of electrical Components
- 3.1.13 Hydraulically operated access stairway- location of electrical Components
- 3.1.14 Air filter and fuel tank – location of electrical components
- 3.2 Connector types overview
- 4 Standard Value Table for Electrical Components
- 5 Tables for Testing and Troubleshooting
- 5.1 Test Value Tables for Transducers
- 5.1.1 Pump press. transducers
- 5.1.2 Hydraulic oil pressure transducers
- 5.1.3 Miscellaneous Pressure Transducers
- 5.1.4 Temperature Transducers
- 5.2 Hydraulic oil temperature charts
- 5.3 PTO gear oil temperature charts
- 5.4 Table of failure codes
- 5.4.1 Table of failure codes for Mechanical Systems PC3000-11 T4
- 5.4.2 Table of failure codes for Electrical Systems PC3000-11 T4
- 5.5 Table of C-codes – Diesel engine QSK38 T4
- 5.6 Table of symptom codes
- 5.6.1 Symptoms of the engines and related electrical systems
- 5.6.2 Symptoms of the hydraulic system
- 5.6.3 Symptoms of the mechanical system
- 5.6.4 Symptoms of additional systems
- 5.7 Cable colour identification
- 6 Troubleshooting by Trouble Code
- B@HANS – Hyd Oil Overheat
- Monitoring hydraulic oil temperature
- Hydraulic oil temperature charts for message B@HANS
- 6A1BMA – Trouble Shut-Off (gate) valve not open error
- View onto the gap of proximity switch 40B031
- Wiring Diagram (40B031) for message 6A1BMA
- AA10NX – Air Cleaner1 Clogging
- View onto the engine air cleaner (AA10NX)
- AB00KE – Charge Voltage Low
- Wiring Diagram (alternator for message AB00KE)
- K@3A00 – Fire In System
- Configuration information for Fire Suppression System Machinery House
- Wiring Diagram (20K351) for message K@3A00
- B@F0MA – CLS1 Lubrication System Error
- B@CPMA – SLS Lubrication System Error
- B@F0N9 – CLS1 pressure increase time too long
- B@CPN9 – SLS pressure increase time too long
- Allocation of vent valves and end-of-line switches
- Vent valve (62Q507a & 62Q509a)
- Wiring Diagram and monitoring selections for message B@F0N9 and B@CPN9
- B@F0N0 – CLS1 pressure decrease time too long
- B@CPN0 – SLS pressure decrease time too long
- Vent valve (62Q507a & 62Q509a)
- B@F0ZK – CLS1 grease level too low
- B@CPZK – SLS grease level too low
- Wiring Diagram – grease level sensors
- B@HAZK – Hydraulic oil level too low
- Hydraulic oil level in defined machine position
- Wiring Diagram – hydraulic oil level sensor 40B004
- B@CBNS – PTO1 Gear Oil Temp High
- View onto the universal pump distributor gearbox (PTO)
- B@CBZG – PTO1 Gear Lubrication Error
- Monitoring PTO lube oil pressure
- Shutdown adjustment for PTO lube oil pressure
- B@H2NX – Breather Filter Clogging
- Location of 40B024 and hydraulic oil level definitions
- B@M9NX – PTO1 Gear Oil Filter Clogging
- View onto the PTO1 gear oil filter with pressure sensor 57B027-1
- B@HBNX – Return Oil Filter Clogging
- B@L4NX – Leak Oil Filter Clogging
- B@L5N9 – Pilot Press X2 Too Low
- Valve cartridge block, location of components
- B@L5N0 – Pilot Press X2 Too High
- Valve cartridge block, location of components
- B@BKPQ – Eng Remote Oil Tank1 Empty
- B@HANX – Screen At Hyd Cooler Entry Clogging
- Hydraulic oil tank & return oil collector pipe with strainer, location of components
- AB30MA – Starter Circuit Abnormality
- Wiring Diagram for message AB30MA
- 989HMA – Emergency stop line abnormality
- Wiring Diagram – emergency line for message 989HMA
- Monitoring screens for message 989HMA
- DGT3MA – PTO1 oil temperature sensor abnormality
- Wiring Diagram and monitoring selections for 57B049-1
- DGH2MA – Hydraulic oil temp sensor abnormality
- Wiring Diagram and monitoring selections for 59B015
- DHQ7MA – PTO1 lube pressure sensor abnormality
- Wiring Diagram and monitoring selections for 57B017-1
- D1E7KB – Starter cut relay short circuit
- Wiring Diagram and monitoring screen for message D1E7KB
- D1E7KY – Starter cut relay hot short circuit
- Wiring Diagram and monitoring screen for message D1E7KY
- DHPEMA – Pump-1/2 pressure sensor abnormality
- DHPGMA – Pump-3/4 pressure sensor abnormality
- DHPJMA – Pump-5/6 pressure sensor abnormality
- Wiring Diagram – PWR and GND supply for pump pressure transducers
- DLE2MA – Engine speed sensor abnormality
- Wiring Diagram and monitoring selection for 57B064-1
- DA27KP – 24V sensor power abnormality
- Wiring Diagram – 24V sensor power supply for DA27KP
- DA26KP – 5V sensor2 power abnormality
- Wiring Diagram – 5V sensor power supply for DA26KP
- DA22KK – Solenoid Power Low Error(Pump Con)
- DA22MA – Solenoid Power Circuit Abnormality
- Wiring Diagram 1 – emergency stop line for message DA22MA
- Wiring Diagram and monitoring selections for message DA22MA
- DXAAKA – Pump1 Solenoid open circuit
- DXABKA – Pump2 Solenoid open circuit
- DXACKA – Pump3 Solenoid open circuit
- DXADKA – Pump4 Solenoid open circuit
- DXAEKA – Pump5 Solenoid open circuit
- DXAFKA – Pump6 Solenoid open circuit
- Wiring Diagram – EPC valve control
- DXAAKB – Pump1 Solenoid short circuit
- DXABKB – Pump2 Solenoid short circuit
- DXACKB – Pump3 Solenoid short circuit
- DXADKB – Pump4 Solenoid short circuit
- DXAEKB – Pump5 Solenoid short circuit
- DXAFKB – Pump6 Solenoid short circuit
- Wiring Diagram – EPC valve control
- DWA5KA – CLS pump solenoid open circuit
- DWA8KA – SLS pump solenoid open circuit
- Wiring Diagram and monitoring selection for messages DWA5KA and DWA8KA
- DWA5KB – CLS pump solenoid short circuit
- DWA8KB – SLS pump solenoid short circuit
- Wiring Diagram and monitoring selection for messages DWA5KB and DWA8KB
- DWA5KY – CLS pump solenoid hot short circuit
- DWA8KY – SLS pump solenoid hot short circuit
- Wiring Diagram and monitoring selection for messages DWA5KY and DWA8KY
- DWA7KA – CLS line release solenoid open circuit
- DWA9KA – SLS lube line release sol. open circuit
- Wiring Diagram and monitoring selection for messages DWA7KA and DWA9KA
- DWA7KB – CLS line release solenoid short circuit
- DWA9KB – SLS lube line release solenoid short circuit
- Wiring Diagram and monitoring selection for messages DWA7KB and DWA9KB
- DWA7KY – CLS line release sol. hot short circuit
- DWA9KY – SLS lube line release sol hot short circuit
- Wiring Diagram and monitoring selection for messages DWA7KY and DWA9KY
- DWAAKA – PTO lube preload solenoid open circuit
- Wiring Diagram and monitoring screen for message DWAAKA
- DWAAKB – PTO lube preload solenoid short circuit
- Wiring Diagram and monitoring screen for message DWAAKB
- DWAAKY – PTO lube preload sol. hot short circuit
- Wiring Diagram and monitoring screen for message DWAAKY
- D168KB – Oil cooler preload sol relay short circuit
- Wiring Diagram and monitoring selection for message D168KB
- D162KB – Horn relay short circuit
- Wiring Diagram and monitoring selection for message D162KB
- D1F0KB – Engine1/motor1 shutdown relay short circuit
- Wiring Diagram and monitoring selection for shutdown relay 11K064-1
- D1F0KY – Engine1/motor1 shutdown relay hot short
- Wiring Diagram and monitoring selection for shutdown relay 11K064-1
- DWNCKA – Hyd. Oil Cooler fan pump1 Sol. open circuit
- Wiring Diagram and monitoring selection for message DWNCKA
- DWNCKB – Hyd. Oil Cooler fan pump1 Sol. short circuit
- Wiring Diagram and monitoring selection for message DWNCKB
- DWN5KA – Radiator fan pump1 Sol. open circuit
- Wiring Diagram and monitoring selection for message DWN5KA
- DWN5KB – Radiator fan pump1 Sol. short circuit
- Wiring Diagram and monitoring selection for message DWN5KB
- D110KA – Battery relay open circuit
- Wiring Diagram and monitoring selection for message D110KA
- D110KB – Battery relay short circuit
- Wiring Diagram and monitoring selection for message D110KB
- DA29KQ – Model Selection Abnormality
- Monitoring screen for machine selection
- Wiring Diagram for message DA29KQ
- DA2YKQ – Motor/Engine Selection Abnormality
- Monitoring screen for machine selection
- DA20KQ – Pump Con Selection Abnormality
- Monitoring screen for PUMP controller selection
- DLM8MA – Oil cooler fan1 speed sensor abnormality
- DLMAMA – Oil cooler fan2 speed sensor abnormality
- Wiring Diagram and monitoring selections for messages DLM8MA and DLMAMA
- FF11LK – Starter power cut relay1 abnormality
- FF12LK – Starter power cut relay2 abnormality
- DDABL4 – Lock lever switch mismatch
- Wiring Diagram and monitoring selections for message DDABL4
- DWNPKA – Service arm up solenoid open circuit
- Wiring Diagram and monitoring screen for message DWNPKA
- DWNPKB – Service arm up solenoid short circuit
- Wiring Diagram and monitoring screen for message DWNPKB
- DWNPKY – Service arm up solenoid hot short circuit
- Wiring Diagram and monitoring screen for message DWNPKY
- DWNQKA – Service arm down solenoid open circuit
- Wiring Diagram and monitoring screen for message DWNQKA
- DWNQKB – Service arm down solenoid short circuit
- Wiring Diagram and monitoring screen for message DWNQKB
- DWNQKY – Service arm down solenoid hot short circuit
- Wiring Diagram and monitoring screen for message DWNQKY
- DWACKA – Service arm check valve sol. open circuit
- Wiring Diagram and monitoring screen for message DWACKA
- DWACKB – Service arm check valve sol. short circuit
- Wiring Diagram and monitoring screen for message DWACKB
- DWACKY – Service arm check valveSol hotShortCircuit
- Wiring Diagram and monitoring screen for message DWACKY
- DWADKA – Ladder speed control solenoid open circuit
- Wiring Diagram and monitoring screen for message DWADKA
- DWADKB – Ladder speed control sol. short circuit
- Wiring Diagram and monitoring screen for message DWADKB
- DWADKY – Ladder speed control sol. hot short circuit
- Wiring Diagram and monitoring screen for message DWADKY
- DBW6MA – 5V sensor2 power abnormality
- Wiring Diagram 1 – 5V power supply and GND output at VALVE0
- Wiring Diagram 2 – 5V power supply and GND – 10B610 – 10B614
- Wiring Diagram 3 – 5V power supply and GND – 10B615 – 10B619
- Wiring Diagram 4 – 5V power supply and GND – 10B620 – 10B624
- DBW9KQ – Model Selection Abnormality
- Wiring Diagram and monitoring screen for message DBW9KQ
- DBWZKQ – Lever control selection abnormality
- Wiring Diagram and monitoring screens for message DBWZKQ
- DBWYKQ – Attachment selection abnormality
- Wiring Diagram and monitoring screens for message DBWYKQ
- DBW2KK – Solenoid Power Low Error(VALVE/M Con)
- Wiring Diagram 1 for message DBW2KK
- Wiring Diagram 2 and monitoring selection for message DBW2KK
- DBW0KQ – VALVE/M Con Selection Abnormality
- Monitoring screen and Wiring Diagram for message DBW0KQ
- DDDWMC – Ladder operation switch abnormality
- Wiring Diagram and monitoring screen for message DDDWMC
- DWNRKA – Ladder up solenoid open circuit
- Wiring Diagram and monitoring selection for message DWNRKA
- DWNRKB – Ladder up solenoid short circuit
- Wiring Diagram and monitoring selection for message DWNRKB
- DWNRKY – Ladder up solenoid hot short circuit
- Wiring Diagram and monitoring selection for message DWNRKY
- D5ZWKB – Travel hour meter short circuit
- Wiring Diagram and monitoring selection for message D5ZWKB
- D1EUKB – Travel alarm relay short circuit
- Wiring Diagram and monitoring selection for message D1EUKB
- DJH2KX – Hydraulic oil level sensor abnormality
- Wiring Diagram and monitoring screen for message DJH2KX
- DJE3KX – Remote engine oil level1 sens. abnormality
- Wiring Diagram and monitoring screen for message DJE3KX
- DH2GKX – Suction tank pressure sensor abnormality
- Wiring Diagram and monitoring screen for message DH2GKX
- DH2HKX – Oil cooler pressure sensor abnormality
- Wiring Diagram and monitoring screen for message DH2HKX
- DH2JKX – Preload valve return oil press abnormality
- Wiring Diagram and monitoring screen for message DH2JKX
- DHSUKX – X2 pressure sensor abnormality
- Wiring Diagram and monitoring screen for message DHSUKX
- DJF1KX – Fuel level sensor abnormality
- Wiring Diagram and monitoring screen for message DJF1KX
- DGE5MA – Ambient air temp sensor abnormality
- Wiring Diagram and monitoring screen for message DGE5MA
- DH2KKX – Return oil chamber press. sensor abnormal
- Wiring Diagram and monitoring screen for message DH2KKX
- DH2LKX – Leak oil chamber press. sensor abnormality
- Wiring Diagram and monitoring screen for message DH2LKX
- DJE5L4 – SLS sensor system abnormality
- Wiring Diagram and monitoring screen for message DJE5L4
- DJE6L4 – CLS sensor system abnormality
- Wiring Diagram and monitoring screen for message DJE6L4
- DBVLKA – Operating Lamp Open Circuit(KOMTRAX)
- Wiring Diagram for message DBVLKA
- DBVLKB – Operating Lamp Short Circuit(KOMTRAX)
- Wiring Diagram for message DBVLKB
- DBV1KK – KOMTRAX Plus source voltage Error
- Wiring Diagram for message DBV1KK
- DBV5KB – 5V sensor1 power abnormality
- Wiring Diagram 1 and monitoring screen for message DBV5KB
- Wiring Diagram 2 for message DBV5KB
- DBV6KB – 24V Sensor Power Abnormality
- Wiring Diagram 1 and monitoring screens for message DBV6KB
- Wiring Diagram 2 for message DBV6KB
- DAFGMC – GPS Module Error
- Wiring Diagram for message DAFGMC
- D862KA – GPS Antenna Open Circuit
- DBVVKR – Ethernet 1 Disconnection
- DBVWKR – Ethernet 2 Disconnection
- DA2RKR – CAN1 Discon (Pump Con)
- CAN1 overview for message DA2RKR
- DBWRKR – CAN1 Discon (Valve/M Con)
- CAN1 overview for message DBWRKR
- DB2QKR – CAN2 Discon (Engine Con)
- CAN2 overview for message DB2QKR
- Wiring Diagram for PWR supply at 52K014-1 (DB2QKR)
- DA2QKR – CAN2 Discon (Pump Con)
- CAN2 overview for message DA2QKR
- DBWQKR – CAN2 Discon (Valve/M Con)
- CAN2 overview for message DBWQKR
- DBVRKR – CAN1 Discon (KOMTRAX Plus)
- CAN1 overview for message DBVRKR
- DBVQKR – CAN2 Discon (KOMTRAX Plus)
- CAN2 overview for message DBVQKR
- DBPRKR – CAN1 Discon (KomVision)
- CAN1 overview for message DBPRKR
- DBPQKR – CAN2 Discon (KomVision)
- CAN2 overview for message DBPQKR
- DAFLKA – Operating Lamp Open Circuit(Monitor)
- Wiring Diagram for message DAFLKA
- DAFLKB – Operating Lamp Short Circuit(Monitor)
- Wiring Diagram for message DAFLKB
- D19YKB – Emergency Lighting Ladder Relay Short Circuit
- Wiring Diagram and monitoring screen for message D19YKB
- DV00KB – Shutdown Buzzer Short Circuit
- Wiring Diagram and monitoring screen for message DV00KB
- DAF0KM – Inconsistency of KomVision Setting
- DBP5KP – Camera Power Output Voltage Low
- Wiring Diagram for message DBP5KP
- DBP0NR – KomVision Controller High Temperature Error
- DPQ4KB – Short Circuit of KomVision Monitor ON/OFF Signal
- Wiring Diagram for message DPQ4KB
- DBP0KT – KomVision Controller Internal Error
- DBP0KM – KomVision Controller Setting Error
- DR10KA – Disconnection of Camera 1 NTSC Input
- DR20KA – Disconnection of Camera 2 NTSC Input
- DR30KA – Disconnection of Camera 3 NTSC Input
- DR40KA – Disconnection of Camera 4 NTSC Input
- DR50KA – Disconnection of Camera 5 NTSC Input
- DR60KA – Disconnection of Camera 6 NTSC Input
- DR90KA – Disconnection of Camera 7 NTSC Input
- Wiring Diagram for message DR10KA…DR90KA
- DPQ4KT – KomVision Monitor Internal Error
- DBPLKA – Operating Lamp Open Circuit (KomVision)
- Wiring Diagram for message DBPLKA
- DBPLKB – Operating Lamp Short Circuit (KomVision)
- Wiring Diagram for message DBPLKB
- DBPWKR – Ethernet 1 Discon (KomVision)
- DBPXKR – Ethernet 2 Discon (KomVision)
- 7 Troubleshooting by Symptoms
- 7.1 Symptoms of the engine and related electrical system
- SEL001 – Engine does not start (engine does not rotate)
- Wiring Diagram 1 and monitoring selections for Lock lever switch 20S105a/b
- Wiring Diagram 2 (engine start) for trouble code SEL001 & SEL001a
- SEL001a – Engine does not start (Pre-lube does not stop)
- SEL002 – Engine stops while in operation
- View onto the fuel system water separator (SEL002)
- SEL003 – Engine speed is hunting during boom-up movement
- SEL004 – Engine does not stop
- SEL005 – Engine lacks output (no power)
- Judgment Table for SEL005
- SEL006 – Engine does not start (Pre-lube does not stop)
- SEL007 – Oil consumption is excessive
- Judgment Table for SEL007
- SEL008 – Oil becomes contaminated quickly
- Judgment Table for SEL008
- SEL009 – Fuel consumption is excessive
- Judgment Table for SEL009
- SEL010 – Oil is in engine coolant
- Judgment Table for SEL010
- SEL011 – Oil level rises
- Judgment Table for SEL011
- SEL012 – Coolant temperature becomes too high (overheating)
- Judgment Table for SEL012
- 7.2 Symptoms of the Hydraulic System
- SHY001 – All the work equipment shows lack of power or slow movement (especially the "boom up" function)
- SHY002 – Engine speed sharply drops or engine stalls too much
- SHY003 – No work equipment, travel or slew movement
- SHY004 – Work equipment has too much hydraulic drift
- SHY005 – Work equipment has big time lag
- SHY006 – Excavator deviates during travel movement
- SHY007 – Hydraulic system has lack of power
- SHY008 – Excavator does not slew
- Slew brake block (SHY008)
- SHY009 – Slew acceleration is poor (or slew speed is very low)
- SHY010 – Excessive overrun when stopping slew movement
- SHY011 – Floating system without function (FSA only)
- Floating system – overview (SHY011)
- SHY012 – Abnormal noise coming from SRV or MRV
- SHY013 – Track tensioning system without function
- View onto the elements of the hydraulic track tensioning system (SHY013)
- SHY014 – Stairway does not move, or slow movement
- SHY015 – Refilling arm does not move, or slow movement
- SHY016 – Refilling arm is sagging when engine is not running
- SHY017 – The hydr. driven grease pump does not move
- SHY018 – Abnormal track chain movement during digging
- SHY019 – Slew parking brake without function
- SHY020 – Travel parking brake without function
- 7.3 Symptoms of the Mechanical System
- SME001 – Abnormal noise is made
- Judgment Table for SME001
- SME002 – Abnormal noise around the PTO / hydraulic pumps
- SME003 – Vibration is excessive (engine mountings)
- Judgment Table for SME003
- SME004 – Vibration is excessive (engine torsion)
- SME005 – There is a big shock when stopping slew movement
- SME006 – There is a big abnormal noise when moving/stopping slew movement
- SME007 – Fan blades make abnormal noise
- SME008 – Abnormal noise coming from a travel gearbox
- SME009 – Abnormal noise coming from the work equipment (lack of grease)
- SME010 – Abnormal idler movement
- SME011 – Leak at the PTO shaft seal
- 7.4 Symptoms of Additional Systems
- SAD001 – Air conditioner for the cabin does not work
- View onto the A/C unit (SAD001)
- SAD002 – Air conditioner compressor clutch is burnt
- View onto the A/C compressor and its mounting (SAD002)
- SAD003 – Air conditioning system defective (pipes and hoses full of moisture)
- View onto an A/C filling and service station
- 50 Disassembly and Assembly
- Table of Contents
- 1 Introduction
- 1.1 Foreword
- 1.2 Recommendations for environmentally friendly operation and maintenance of hydraulic mining shovels
- 1.3 Diagrams and illustrations in this manual
- 1.4 Procedures for disassembling and assembling in this manual
- 1.5 Explanation of abbreviations
- 2 Safety
- 2.1 Overview
- 2.1.1 Method of using this manual
- 2.2 General precautions
- 2.2.1 General
- 2.2.2 Personal protective clothing
- 2.2.3 When using a hammer
- 2.2.4 Proper tools
- 2.2.5 Personnel
- 2.2.6 Fire prevention
- 2.2.7 Unauthorized modification
- 2.3 Precautions for maintenance and repair
- 2.3.1 General precautions
- 2.3.2 Keep work place clean and tidy
- 2.3.3 Precautions when welding
- 2.3.4 Precaution with high pressure fluids
- 2.3.4.1 Handling high pressure hoses and pipes
- 2.3.5 Compressed air
- 2.3.6 Waste materials
- 2.3.7 Isolate the excavator using the transfer pump
- 2.3.8 Isolate the excavator
- 2.3.9 De-isolate the excavator
- 3 Superstructure
- 3.1 Superstructure
- 3.2 Machinery house
- 3.2.1 Machinery house roof
- 3.2.1.1 Disassembling of the Machinery house roof cover plates
- 3.2.1.2 Assembling of the Machinery house roof cover plates
- 3.2.1.3 Disassembling of the SCR catalysts (T4 Equipment)
- 3.2.1.4 Assembling of the SCR catalysts (T4 Equipment)
- 3.2.1.5 Disassembling of the DEF tank assembly (T4 Equipment)
- 3.2.1.6 Assembling of the DEF tank assembly (T4 Equipment)
- 3.2.2 Disassembling of the Traverse Assembly
- 3.2.3 Assembling of the traverse Assembly
- 3.2.3.1 Disassembling of the handrails
- 3.2.3.2 Assembling of the handrails
- 3.2.4 Air intake system
- 3.2.4.1 Disassembling of the air intake system
- 3.2.4.2 Assembling of the air intake system
- 3.3 Diesel engine
- 3.3.1 Disassembling of the Diesel engine
- 3.3.2 Assembling of the diesel engine
- 3.3.3 Disassembling of the batteries
- 3.3.4 Assembling of the batteries
- 3.4 Flexible drive coupling
- 3.4.1 Disassembling of the CentaFlex coupling assembly
- 3.4.2 assembling of the CentaFlex coupling assembly
- 3.5 Engine cooling system
- 3.5.1 Radiator assembly
- 3.5.1.1 Disassembling of the Radiator assembly
- 3.5.2 assembling of the radiator assembly
- 3.5.3 Disassembling of the radiator fan assembly
- 3.5.3.1 Assembling of the radiator fan assembly
- 3.5.4 Main pumps assemblies
- 3.5.4.1 Preparatory works for main pump disassembling
- 3.5.4.2 Disassembling of main pump 1…3 assembly
- 3.5.4.3 Assembling of main pump 1…3 assembly
- 3.5.4.4 Disassembling of the Auxiliary pump (Pilot oil pump)
- 3.5.4.5 Assembling of the pilot oil pump
- 3.5.5 Pump distributor gear box (PTO)
- 3.5.5.1 Disassembling of the pump distributor gear box (PTO)
- 3.5.5.2 Assembling of the pump distributor gear box (PTO)
- 3.6 Hydraulic system
- 3.6.1 hydraulic cooler fan assembly
- 3.6.1.1 Disassembling of the hydraulic cooler fan assembly
- 3.6.1.2 Assembling of the hydraulic cooler fan assembly
- 3.6.1.3 Disassembling of hydraulic cooler fan and motor
- 3.6.1.4 Assembling of hydraulic cooler fan and motor
- 3.6.1.5 Disassembling of the hydraulic oil coolers
- 3.6.1.6 Assembling of the hydraulic oil coolers
- 3.6.1.7 Disassembling of the hydraulic oil cooler Assembly
- 3.6.1.8 Assembling of the hydraulic oil cooler Assembly
- 3.6.2 Main shut off valve
- 3.6.2.1 Disassembling of the main shut off valve
- 3.6.2.2 Assembling of the main shut off valve
- 3.6.3 Hydraulic oil tank
- 3.6.3.1 Disassembling of the hydraulic oil tank
- 3.6.3.2 Assembling of the hydraulic oil tank
- 3.6.4 Main control valve blocks
- 3.6.4.1 Disassembling of the main control valve blocks
- 3.6.4.2 Assembling of the main control valve blocks
- 3.6.4.3 Disassembling of the MRV at the main control valve blocks
- 3.6.4.4 Assembling of the MRV at the main control valve blocks
- 3.6.4.5 Disassembling of SRV on main control valve block
- 3.6.4.6 Assembling of SRV on main control valve blocks
- 3.6.4.7 Disassembling of ACV-/SRV-block on main control valve blocks
- 3.6.4.8 Assembling of ACV-/SRV-block on main control valve blocks
- 3.6.5 Distributor Manifold
- 3.6.5.1 Disassembling of anti cavitation valve blocks at the distributor manifold
- 3.6.5.2 Assembling of anti cavitation valve blocks at the distributor manifold
- 3.6.5.3 Disassembling of throttle check valves at the distributor manifold
- 3.6.5.4 Assembling of throttle check valves at the distributor manifold
- 3.6.5.5 Disassembling of the diffuser block on the distributor manifold (FSA only)
- 3.6.5.6 Assembling of the diffuser block on the distributor manifold (FSA only)
- 3.6.5.7 Disassembling of the manifold
- 3.6.5.8 Assembling of the manifold
- 3.7 Slew system
- 3.7.1 Slew gear box
- 3.7.1.1 Disassembling of the slew gear box
- 3.7.1.2 Assembling of the slew gear box
- 3.7.2 slew brake valve block
- 3.7.2.1 Disassembling of the slew brake valve block
- 3.7.2.2 Assembling of the slew brake valve block
- 3.7.3 Slew motor
- 3.7.3.1 Disassembling of the slew motor
- 3.7.3.2 Assembling of the slew motor
- 3.7.4 Slew parking brake
- 3.7.4.1 Disassembling the slew parking brake of type 2063
- 3.7.4.2 Assembling the slew parking brake of type 2063
- 3.7.4.3 Disassembling of the slew parking brake assembly of type 632770
- 3.7.4.4 Assembling of the slew parking brake assembly of type 632770
- 3.7.5 Slew circle lubrication pinion (dummy wheel)
- 3.7.5.1 Disassembling of the slew circle lubrication pinion assembly
- 3.7.5.2 Assembling of the slew circle lubrication pinion assembly
- 3.7.6 Slew circle
- 3.7.6.1 Disassembling of the slew circle
- 3.7.6.2 Assembling of the slew circle
- 3.8 Lubrication pumps
- 3.8.1 Disassembling of the lubrication pump
- 3.8.2 Assembling of the lubricating pump
- 3.9 Operator’s cab
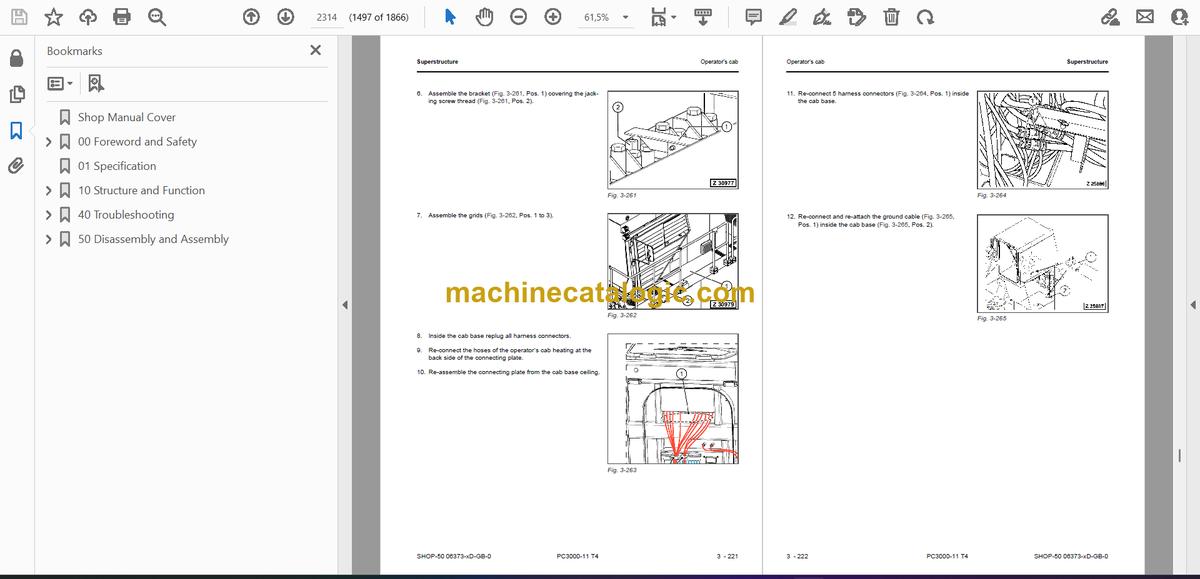
- 3.9.1 Disassembling of the operator’s cab
- 3.9.2 Assembling of the operator’s cab
- 3.9.3 Cab mounts
- 3.9.3.1 Disassembling of the cab mounts
- 3.9.3.2 Assembling of the cab mounts
- 3.9.4 Front window (windshield)
- 3.9.4.1 Disassembling of the front window
- 3.9.4.2 Assembling of the front window
- 3.9.5 Operator’s seat
- 3.9.5.1 Disassembling of the operator’s seat
- 3.9.5.2 Assembling of the operator’s seat
- 3.10 Cab base
- 3.10.1 Disassembling of the cab base
- 3.10.2 Assembling of the cab base
- 3.11 Hydraulic access Stairway
- 3.11.1 Disassembling of access Stairway
- 3.11.2 Assembling of access Stairway
- 3.11.3 Disassembling of access ladder cylinder
- 3.11.4 Assembling of access stairway cylinder
- 3.12 Counterweight
- 3.12.1 Disassembling of the counterweight
- 3.12.2 Assembling of the counterweight
- 3.13 Fuel tank
- 3.13.1 Disassembling of the fuel tank
- 3.13.2 Assembling of the fuel tank
- 3.13.3 Disassembling of the fuel cooler box
- 3.13.4 Assembling of the fuel cooler box
- 3.14 Superstructure lifting
- 3.14.1 Disassembling the superstructure from the undercarriage
- 3.14.2 Assembling the superstructure onto the undercarriage
- 4 Undercarriage
- 4.1 Undercarriage overview
- 4.2 Travel System
- 4.2.1 Crawler Track
- 4.2.1.1 Changing the crawler track
- 4.2.2 Sprocket
- 4.2.2.1 Disassembling of the sprocket
- 4.2.2.2 Assembling of the sprocket
- 4.2.3 Guide wheels (Idlers)
- 4.2.3.1 Disassembling of the guide wheel assembly
- 4.2.3.2 Assembling of the guide wheel assembly
- 4.2.4 Track tensioning accumulators
- 4.2.4.1 Disassembling of the low pressure accumulators
- 4.2.4.2 Assembling of the low pressure accumulators
- 4.2.4.3 Disassembling of the high pressure accumulators
- 4.2.4.4 Assembling of the high pressure accumulators
- 4.2.5 Track tension valve block
- 4.2.5.1 Disassembling of the track tensioning valve block
- 4.2.5.2 Assembling of the track tensioning valve block
- 4.2.6 Track tensioning cylinders
- 4.2.6.1 Disassembling of the track tensioning cylinders
- 4.2.6.2 Assembling of the track tensioning cylinders
- 4.2.7 Substitute the hydraulic hoses of the track tensioning system
- 4.2.7.1 Precursory work
- 4.2.7.2 Replace the hydraulic hoses inside the car body
- 4.2.7.3 Replace the hydraulic hose between the car body and the crawler frame
- 4.2.7.4 Replace the hydraulic hoses inside the crawler frame
- 4.2.7.5 Subsequent work
- 4.2.8 Travel brake valve block (overspeed valve)
- 4.2.8.1 Disassembling of the travel brake valve block
- 4.2.8.2 Assembling of the travel brake valve block
- 4.2.9 Travel motor
- 4.2.9.1 Disassembling of the travel motors
- 4.2.9.2 Assembling of the travel motors
- 4.2.10 Travel parking brake
- 4.2.10.1 Disassembling of the travel parking brake
- 4.2.10.2 Assembling of the travel parking brake
- 4.2.11 Travel gear box
- 4.2.11.1 Disassembling of the travel gear box
- 4.2.11.2 Assembling of the travel gear box
- 4.2.12 Carrier roller
- 4.2.12.1 Disassembling of the carrier roller assembly
- 4.2.12.2 Assembling of the carrier roller assembly
- 4.2.13 Track roller
- 4.2.13.1 Disassembling of the track roller assembly
- 4.2.13.2 Assembling of the track roller assembly
- 4.3 Car body
- 4.3.1 Disassembling of the car body and the crawler carriers
- 4.3.2 Assembling of the car body and the crawler carriers
- 4.3.2.1 Install crawler carrier mounting bolts
- 4.3.3 Rotary joint
- 4.3.3.1 Disassembling of the rotary joint
- 4.3.3.2 Assembling of the rotary joint
- 5 Attachment
- 5.1 Repair procedures
- 5.1.1 Replacement of bushings at the attachment
- 5.1.1.1 Removal of the bushings
- 5.1.1.2 Installation of the bushings
- 5.1.2 General installation instructions for attachment pins
- 5.2 Backhoe
- 5.2.1 Overview
- 5.2.2 Pin Sealing bucket – Steering Rod – bucket link rod
- 5.2.3 Boom
- 5.2.3.1 Disassembling of the boom
- 5.2.3.2 Assembling of the boom
- 5.2.3.3 Disassembling of boom cylinders
- 5.2.3.4 Assembling of boom cylinders
- 5.2.4 Stick assembly
- 5.2.4.1 Disassembling of the stick
- 5.2.4.2 Assembling of the stick
- 5.2.4.3 Disassembling of the stick cylinders
- 5.2.4.4 Assembling of the stick cylinders
- 5.2.5 Bucket and steering
- 5.2.5.1 Disassembling of the bucket
- 5.2.5.2 Assembling of the bucket
- 5.2.5.3 Disassembling of bucket cylinders
- 5.2.5.4 Assembling of bucket cylinders
- 5.2.5.5 Disassembling of the bucket link rod
- 5.2.5.6 Assembling of the bucket link rod
- 5.2.5.7 Disassembling of the steering rods
- 5.2.5.8 Assembling of the steering rod
- 5.2.6 Hydraulic hoses at the backhoe attachment
- 5.2.6.1 Replacement of the boom arc hoses
- 5.2.6.2 Replacement of the boom cylinder hoses
- 5.2.6.3 Replacement of the stick cylinder hoses
- 5.2.6.4 Replacement of the bucket cylinder hoses
- 5.3 Face shovel
- 5.3.1 Overview
- 5.3.2 Using the Cylinder Mounting Device for Front shovel attachments (PN 967 000 40)
- 5.3.2.1 Designated usage
- 5.3.2.2 Non-designated usage
- 5.3.3 Boom
- 5.3.3.1 Disassembling of the boom
- 5.3.3.2 Assembling of the boom
- 5.3.3.3 Disassembling of the boom cylinders
- 5.3.3.4 Assembling of the boom cylinders
- 5.3.4 Stick assembly
- 5.3.4.1 Disassembling of the stick
- 5.3.4.2 Assembling of the stick
- 5.3.4.3 Disassembling of the stick cylinders
- 5.3.4.4 Assembling of the stick cylinders
- 5.3.5 Bull clam bucket
- 5.3.5.1 Disassembling of the bull clam bucket
- 5.3.5.2 Assembling of the bull clam bucket
- 5.3.5.3 Disassembling of the bucket cylinders
- 5.3.5.4 Assembling of the bucket cylinders
- 5.3.5.5 Disassembling of the clam cylinders
- 5.3.5.6 Assembling of the clam cylinders
- 5.3.6 Hydraulic hoses at the face shovel attachment
- 5.3.6.1 Replace the boom arc hoses
- 5.3.6.2 Replace the boom cylinder hoses
- 5.3.6.3 Replace the stick arc hoses
- 5.3.6.4 Replace the stick cylinder hoses
- 5.3.6.5 Replace the bucket cylinder hoses
- 5.3.6.6 Replace the clam cylinder hoses
- 5.4 Metering valves (grease injectors) at the attachment
- 5.4.1 Disassembling of the metering valves (grease injectors)
- 5.4.2 Assembling of the metering valves (grease injectors)
- 5.5 Ground engaging tools (GET)
- 5.5.1 Disassembling and assembling of the GET
- 5.6 Cylinder bypass test
- 6 Service Information
- 6.1 Fluids and lubricants
- 6.2 Lifting Gears
- 6.3 Safety hints for sling accessory
- 6.4 Weight tables
- 6.4.1 Superstructure
- 6.4.2 Undercarriage
- 6.4.3 Backhoe attachment (BHA)
- 6.4.4 Face shovel attachment (FSA)
- 6.5 Torque charts according to KOMATSU company standard
- 6.5.1 Metric standard thread
- 6.5.2 Metric fine thread
- 6.5.3 Cummins motor torques – metric
- 6.5.4 Cummins motor torques – U.S. customary
- 6.5.5 Torque Charts for Flange Joints
- 6.5.6 Tightening Torque for hydraulic hose connecting nut
- 6.6 Blind plugs
- 6.6.1 Dummy plates for hydraulic–flanges
- 6.6.2 Classification of threads to the nominal width
- 6.6.3 Plugs and fittings according to DIN 2353
- 6.7 Conversion table
- 6.7.1 Method of using the conversation table
- 6.7.2 Millimeter – inch & kilogram – pound
- 6.7.3 Liter – U.S. gallon & liter – U.K. gallon
- 6.7.4 Nm- ft.lb
- 6.7.5 Bar – PSI – kPa – MPa
- 6.7.6 Temperature
- 6.8 Tools
- 6.8.1 Standard tool case
- 6.8.2 Used special tools (Overview)
- 6.9 Work instructions
- 6.9.1 Bleeding the track tensioning system
- 6.9.2 General installation procedures for hydraulic hose lines
- 6.9.3 Remove / install the crawler carrier
- 6.9.4 Repair procedure for the radiator assembly
- 7 Parts & Service News
- 7.1 List of The PARTS AND SERVICE NEWS
Komatsu


