The Bobcat 325 is a small compact excavator you'll see trenching, doing service line work, or cleaning up around houses and farms. The service manual is what I pull in the shop when a 325 comes in with hydraulic issues, wiring gremlins, or engine work beyond basic filters and fluids. Buyers usually want it when the machine is out of warranty and they're tired of guessing. You're looking at this to get real repair steps, not safety stickers and daily checks.
What this manual helps you do
- Trace and diagnose hydraulic problems in the boom, arm, bucket, and auxiliary circuits on a 325 in the listed serial range
- Check and set hydraulic and pilot control pressures using the correct test ports and sequences
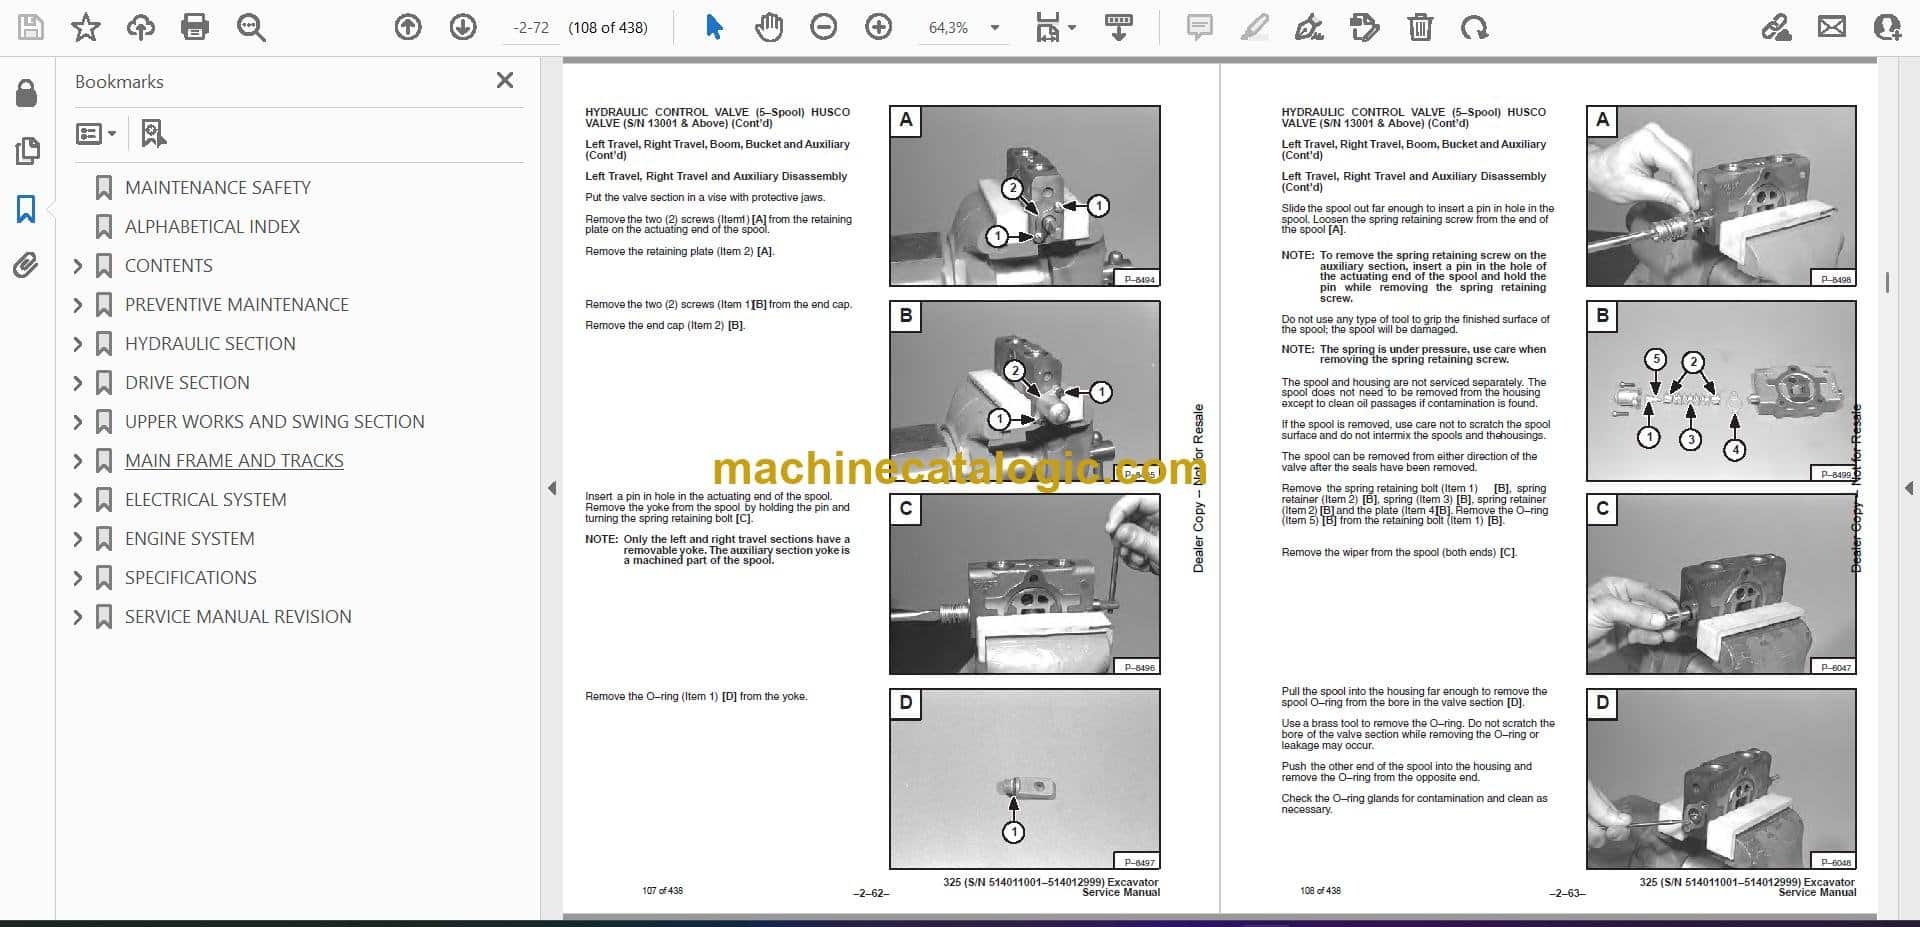
- Follow teardown and reassembly steps for swing motor, travel motors, cylinders, and main control valve on this exact model
- Diagnose electrical issues using wiring diagrams that match this 51401-serial machine, including starting/charging and safety circuits
- Replace and adjust engine, cooling, and drive components with the right sequences and inspection points, not just guesswork
Who this is for
This is for a shop mechanic, field tech, small contractor, rental fleet, or owner-operator working on a Bobcat 325 with serial number between 514011001 and 514012999. If you just need to learn how to run the machine or do basic daily service, you want the operator's handbook, not this manual.
FAQ
Q: Is this a searchable PDF and are the wiring diagrams readable?
A: These manuals are usually scanned or native PDFs that you can search, and the wiring diagrams are laid out so you can zoom in and read pin numbers.
Q: How do I know if it matches my machine?
A: Check your serial plate. If your 325 starts with 514011xxx or 514012xxx and falls in 514011001-514012999, this is the right one.
Q: Is this the right document for a full repair?
A: Yes, this is the workshop service manual, not a parts book, so it's what you want for real teardown and diagnostics.
Bottom line, if your 325's serial number falls in 514011001-514012999 and you're doing your own repairs, this is the manual you want. If the serial does not match, skip it.
📘 Show Index
Table of Contents:
- MAINTENANCE SAFETY
- ALPHABETICAL INDEX
- CONTENTS
- FOREWORD
- SAFETY INSTRUCTIONS
- SERIAL NUMBER LOCATIONS
- HYDRAULIC EXCAVATOR SERIAL NUMBER
- ENGINE SERIAL NUMBER
- DELIVERY REPORT
- HYDRAULIC EXCAVATOR IDENTIFICATION
- PREVENTIVE MAINTENANCE
- SERVICE SCHEDULE
- LIFTING AND BLOCKING THE EXCAVATOR
- TRANSPORTING THE HYDRAULIC EXCAVATOR
- ENGINE COVER
- AIR CLEANER SERVICE
- Replacing the Filter Element
- FUEL SYSTEM
- Fuel Specifications
- Filling the Fuel Tank
- Fuel System Maintenance
- Fuel Filter
- Removing Air From the Fuel System
- ENGINE LUBRICATION SYSTEM
- Checking Engine Oil
- Engine Oil and Filter Replacement
- COOLING SYSTEM
- Coolant Level
- Coolant Replacement
- Propylene Glycol (Factory Installed)
- HYDRAULIC SYSTEM
- Checking and Adding Fluid
- Return Line Filter Service
- Replacement of the Hydraulic Filter
- Hydraulic Reservoir
- USING A BOOSTER BATTERY (Jump Starting)
- LUBRICATION OF THE HYDRAULIC EXCAVATOR
- FINAL DRIVE CASE
- Checking Oil Level (S/N 12999 & Below)
- Draining Final Drive Case (S/N 12999 & Below)
- Checking Oil Level (S/N 13001 & Above)
- Draining Final Drive Case (S/N 13001 & Above)
- HEATER AIR FILTER SERVICE
- SPARK ARRESTOR MUFFLER
- Cleaning Spark Arrestor Muffler
- HYDRAULIC SECTION
- HYDRAULIC SCHEMATICS
- HYDRAULIC SYSTEM TROUBLESHOOTING
- HYDRAULIC SERVICE INFORMATION
- Checking the Main Relief Valves (S/N 11001–12999)
- Checking the Main Relief Valves (S/N 13001 & Above)
- Testing the 4050 PSI (27925 kPa) Circuit Relief Valve
- Testing the Auxiliary and Bucket Circuit Relief Valve
- Testing the Left Hand Travel Circuit Relief Valve
- Testing the Right Hand Travel Circuit Relief Valve
- Testing the Boom Circuit Relief Valve
- Checking the Hydraulic Pump
- HYDRAULIC PUMP
- Removal and Installation
- Parts Identification
- Disassembly
- Assembly
- HYDRAULIC CONTROL VALVE (6 Spool) HUSCO VALVE (S/N 11001–12999)
- Removal and Installation
- Parts Identification
- Disassembly
- Inlet Section
- Right Hand & Left Hand Travel
- Boom, Bucket & Arm
- Disassembly
- Assembly
- Port Relief Valves (Adjustable)
- Auxiliary
- Port Relief Valves (Adjustable)
- Parts Identification
- Port Relief Valve Pressure Setting
- Disassembly
- Assembly
- Adjustment Procedure
- Main Relief Valves
- Parts Identification
- Disassembly
- Assembly
- Adjusting the Main Relief Valves
- HYDRAULIC CONTROL VALVE (3 Spool) HUSCO VALVE (S/N 11001 –12999)
- Description
- Removal and Installation
- Parts Identification
- Disassembly
- Blade and Boom Swing
- Lockout Valve Assembly
- Swing Motor Valve
- Build–Up Valve
- Disassembly
- Assembly
- Test Procedure
- HYDRAULIC CONTROL VALVE (5–Spool) HUSCO VALVE (S/N 13001 & Above)
- Left Travel, Right Travel, Boom, Bucket and Auxiliary
- Description
- Removal and Installation
- Parts Identification
- Disassembly
- Outlet Sections Disassembly
- Outlet Sections Assembly
- Mid Inlet Section Disassembly
- Mid Inlet Section Assembly
- Left Travel, Right Travel and Auxiliary Disassembly
- Left Travel, Right Travel and Auxiliary Assembly
- Boom and Bucket Disassembly
- Boom and Bucket Assembly
- Assembly
- PORT RELIEF VALVES AND MAIN RELIEF VALVES (S/N 13001 & Above)
- Parts Identification
- Port Relief Valve Pressure Setting
- Disassembly
- Assembly
- MAIN RELIEF VALVES (Adjustable) (S/N 13001 & Above)
- Parts Identification
- Assembly
- Disassembly
- Assembly
- Adjusting the Main Relief Valves
- HYDRAULIC CONTROL VALVE (5–Spool) HUSCO VALVE (S/N 13001 & Above)
- Boost, Arm, Boom Swing, Blade and Swing Section
- Description
- Removal and Installation
- Parts Identification
- Disassembly
- Inlet Section
- Arm, Boost and Swing Motor Disassembly
- Arm, Boost and Swing Motor Assembly
- Boom Swing Disassembly
- Boom Swing Assembly
- Blade Disassembly
- Blade Assembly
- Assembly
- ACCUMULATOR (S/N 11001 – 12999)
- Pressure Reducing Valve
- Description
- Test Procedure
- Removal and Installation
- Parts Identification
- Disassembly
- Assembly
- Charging
- Setting the Safety Relief Valve
- ACCUMULATOR (S/N 13001 & Above)
- Removal and Installation
- Parts Identification
- PORT BLOCK
- Removal and Installation (S/N 11001–12999)
- Removal and Installation (S/N 13001 & Above)
- AUXILIARY SELECTOR VALVE
- Removal and Installation (S/N 11001–12999)
- Removal and Installation (S/N 13001 & Above)
- Disassembly and Assembly
- TWO SPEED VALVE (S/N 13001 & Above)
- OIL COOLER
- HYDRAULIC RESERVOIR
- HYDRAULIC FILTER ASSEMBLY
- RETURN LINE FILTER
- BOOM CYLINDER
- BOOM CYLINDER SHIELD
- ARM CYLINDER
- BUCKET CYLINDER
- BLADE CYLINDER
- BOOM SWING CYLINDER
- HYDRAULIC CYLINDERS
- JOYSTICK CONTROL CHANGE
- ISO to STANDARD Control Pattern (S/N 12999 & Below)
- STANDARD to ISO Control Pattern (S/N 12999 & Below)
- ISO to STANDARD Control Pattern (S/N 13001 & Above)
- STANDARD to ISO Control Pattern (S/N 13001 & Above)
- DRIVE SECTION
- LEFT CONSOLE (S/N 11001 – 12999)
- Lockout Valve Removal and Installation
- Cylinder Removal and Installation
- Removal and Installation
- LEFT CONSOLE (S/N 13001 & Above)
- Control Lock Micro–Switch
- Cylinder Removal and Installation
- Removal and Installation
- Release Handle
- Removal and Installation
- Disassembly and Assembly
- Adjustment
- Latch Plate
- JOYSTICK (S/N 11001 –12999)
- Left Joystick
- Removal and Installation
- Parts Identification
- Right Joystick
- Removal and Installation
- Troubleshooting
- Parts Identification
- Disassembly and Assembly
- JOYSTICK (S/N 13001 & Above )
- Removal and Installation
- Parts Identification
- Disassembly
- Assembly
- Troubleshooting
- CONTROL LEVERS
- Removal and Installation
- Low Idle Adjustment
- High Idle Adjustment
- Speed Control Lever
- Blade Lever
- RIGHT CONSOLE
- Removal and Installation (S/N 11001 –12999)
- Removal and Installation (S/N 13001 & Above)
- FOOT PEDALS AND STEERING LEVERS
- Removal and Installation
- Bushing Removal and Installation
- UPPER WORKS AND SWING SECTION
- REAR ENGINE COVER
- SEAT AND MOUNTING FRAME
- CENTER FLOOR PANEL
- Removal and Installation
- S/N 12999 & Below
- S/N 13001 & Above
- SWING MOTOR COVER
- REAR FLOOR PANEL
- TOOL BOX
- LEFT SIDE COVER
- CORNER POST
- COUNTERWEIGHTS
- FRONT ENGINE COVER
- FUEL TANK
- BUCKET
- ARM
- BOOM
- BOOM SWING BRACKET
- Removal
- Installation
- Hose Installation
- SWING BRACKET BUSHING
- Bushing Removal
- Bushing Installation
- SWING MOTOR
- Removal and Installation
- Parts Identification
- Disassembly
- Assembly
- CROSS PORT RELIEF VALVE
- Disassembly
- Assembly
- Description
- Testing
- SWING MOTOR DRIVE CARRIER
- Removal and Installation
- Parts Identification
- Disassembly
- Assembly
- UPPERSTRUCTURE AND SWING CIRCLE GEAR
- Removal and Installation
- Swing Bearing Removal
- Swing Bearing Installation
- Alignment Pins (Threaded)
- Alignment Pins (Not Threaded)
- CENTER SWIVEL JOINT
- Removal and Installation (Through Upper AccessCover)
- Removal and Installation (Through Bottom Access Cover) (S/N 11001–12999)
- Removal and Installation (Through Bottom Access Cover) (S/N 13001 & Above)
- Parts Identification
- Description
- Disassembly
- Assembly
- ROPS CANOPY
- CAB
- Removal and Installation
- Two Piece Side Window
- Three Piece Side Windows
- Door Removal and Installation
- Front Window Removal and Installation
- Front Lower Glass Removal and Installation
- Front Upper Plexiglass Removal and Installation
- Left Hand Side Glass Removal and Installation
- Door Glass Removal and Installation
- Rear Glass Removal and Installation
- Right Hand Side Glass Removal and Installation
- Two Piece Side Window
- Three Piece Side Window
- CAB/CANOPY REAR COVER
- MAIN FRAME AND TRACKS
- BLADE
- TRACK
- Track Lug Height
- Track Tension
- Rubber Tracks
- Steel Tracks
- Adjustment (S/N 11001–12999)
- Adjustment (S/N 13001 & Above)
- Removal and Installation
- TRACK FRAME
- Disassembly and Assembly (S/N 11001–12999)
- Disassembly and Assembly (S/N 13001 & Above)
- TRAVEL MOTOR
- Testing
- Removal and Installation (S/N 11001–12999)
- Removal and Installation (S/N 13001 & Above)
- Parts Identification (S/N 11001–12999)
- Disassembly (S/N 11001–12999)
- Assembly (S/N 11001–12999)
- Check Oil Level (S/N 11001–12999)
- Draining Final Drive Case (S/N 11001–12999)
- TRAVEL MOTOR (SOM)
- Checking Oil Level (S/N 13001 & Above)
- Draining Final Drive Case (S/N 13001 & Above)
- Parts Identification (S/N 13001 & Above)
- Disassembly (S/N 13001 & Above)
- Assembly (S/N 13001 & Above)
- TRACK DAMAGE IDENTIFICATION
- Cutting of Steel Cords
- Abrasion of Embedded Metals
- Separation of Embedded Metals
- Separation of Embedded Metals Due To Corrosion
- Cuts On The Lug Side Rubber
- Cracks Of The Lug Side Rubber Due To Fatigue
- Lug Abrasion
- Cracks And Cuts On The Lug Side Rubber
- Abrasion Of The Track Roller Side
- Cuts On The Edges Of Track Roller Side
- ELECTRICAL SYSTEM
- ELECTRICAL SCHEMATICS
- TROUBLESHOOTING
- ELECTRICAL SYSTEM
- Description
- Fuses
- Electrical System Service
- BATTERY
- Checking the Battery
- Removal and Installation
- ALTERNATOR
- Belt Adjustment
- Removal and Installation
- Disassembly and Inspection
- Stator Continuity Test
- Stator Ground Test
- Rotor Continuity Test
- Rotor Ground Test
- Rectifier Continuity (Diode) Test
- Assembly
- STARTER
- Removal and Installation
- Parts Identification
- Disassembly and Assembly
- Cleaning and Inspection
- FUEL LEVEL SENDER
- Removal and Installation
- Checking
- INSTRUMENT PANEL
- GAUGES
- GAUGE LIGHTS
- CAB ELECTRICAL (Cab Option)
- ENGINE SYSTEM
- TROUBLESHOOTING
- VALVE CLEARANCE
- ENGINE COMPRESSION
- FUEL SHUTOFF SOLENOID
- Adjustment
- Removal and Installation
- Timer Module Removal and Installation
- FUEL INJECTION PUMP
- Checking the Injection Pump
- Removal and Installation
- Timing the Injection Pump
- FUEL INJECTOR NOZZLES
- Removal and Installation
- Checking the Injector Nozzle
- GLOW PLUGS
- Removal and Installation
- Checking the Glow Plug
- FAN GUARD
- RADIATOR
- MUFFLER
- AIR CLEANER
- ENGINE
- ENGINE FLYWHEEL
- FLYWHEEL RING GEAR
- CYLINDER HEAD
- Removal and Installation
- Disassembly and Assembly of the Cylinder Head
- Servicing the Cylinder Head
- Top Clearance
- VALVE, VALVE SEAT AND GUIDE
- Checking the Valve Guide
- Reconditioning the Valve and Valve Seat
- Valve Spring
- ROCKER ARM AND SHAFT
- TIMING GEARCASE COVER
- IDLER GEAR AND CAMSHAFT
- Removal and Installation
- Servicing the Idler Gear and Shaft
- TIMING GEARS
- FUEL CAMSHAFT
- Removal and Installation
- Governor
- CRANKSHAFT GEAR
- OIL PUMP
- Removal and Installation
- Oil Pump Service
- Checking Engine Oil Pressure
- Relief Valve
- PISTON AND CONNECTING ROD
- Removal and Installation
- Servicing the Piston and Connecting Rod
- Connecting Rod Alignment
- CRANKSHAFT AND BEARINGS
- Removal and Installation
- Servicing the Crankshaft and Bearings
- CYLINDER BORE
- Checking the Cylinder Bore
- WATER PUMP
- SPECIFICATIONS
- HYDRAULIC EXCAVATOR SPECIFICATIONS
- Machine Dimensions
- Lifting Capacity
- HYDRAULIC SYSTEM
- SWING SYSTEM
- HYDRAULIC CYLINDERS
- DRIVE SYSTEM
- BRAKES
- UNDERCARRIAGE
- STD TRACK SHOES
- CAPACITIES
- DIGGING FORCE
- ENGINE SPECIFICATIONS
- Fuel Injection Nozzles
- Fuel Injection Pump
- Cylinder Head
- Valves
- Valve Springs
- Valve Timing
- Rocker Arms
- Camshaft
- Tappet
- Cylinders
- Piston Rings
- Pistons
- Connecting Rod
- Oil Pump
- Crankshaft
- Timing Gear
- Thermostat
- Engine Bolt Torque
- Re–Grinding The Crankshaft
- FUEL, COOLANT AND LUBRICANTS CHART
- ENGINE OIL SPECIFICATIONS
- Description
- Ethylene Glycol
- Propylene Glycol
- BUCKET SPECIFICATIONS
- DECIMAL AND MILLIMETER EQUIVALENTS
- U.S. TO METRIC CONVERSION
- SERVICE MANUAL REVISION
- 325-1
- 325-2
- 325-3
- 325-4
- 325-5
- 325-6
Bobcat Software
Bobcat PDF Manuals