$ 0
0
$ 0
0

Bobcat E19 Excavator Service Manual (SN AWMM11001-AWMM99999)

Format: PDF (Printable Document)

File Language: English

File Pages: 747

File Size: 24.45 MB (Speed Download Link)

Brand: Bobcat

Model: E19 Excavator

Book No: 7255013

Serial No: SN AWMM11001-AWMM99999

Type of Document: Service Manual

Categories: ,

$ 45

Share:

Bobcat E19 Excavator Service Manual (SN AWMM11001-AWMM99999)

The Bobcat E19 is a compact excavator that spends its life in tight spaces: trenching utilities, digging footings, fence lines, and drainage around houses. The people who reach for this service manual are the ones actually keeping it alive past warranty: shop mechanics, field techs, and owner-operators who do their own repairs. They want torque specs, hydraulic test points, wiring info, and step-by-step teardown so the machine goes back out clean and dry, not leaking and guessing.

What this manual helps you do

  • Diagnose hydraulic problems by checking test ports, relief valves, and pilot controls on the E19's hydraulic system
  • Trace and troubleshoot electrical faults using the E19-specific wiring diagrams and connector callouts
  • Follow step sequences to remove, rebuild, and reinstall major components like travel motors, swing gear, cylinders, and the house rotation system
  • Set and verify adjustments on controls, tracks, slew brake, and hydraulic functions after repairs or component replacement
  • Replace and time engine-side components and related systems with the right order of operations and reference values

Who this is for

This is for anyone maintaining or repairing a Bobcat E19 in the AWMM11001-AWMM99999 serial range: small contractors, rental fleets, shop mechanics, and owner-operators. If you only need how to run the machine or daily checks, you want the operator's handbook instead, not this manual.

FAQ

Q: Is this a searchable PDF, and can I read the wiring diagrams clearly?

A: Yes, this kind of manual is normally a searchable PDF and the wiring pages are laid out so you can zoom in to read pin numbers and wire colors.

Q: How do I know if it fits my exact E19?

A: Check your serial plate. If your E19 serial number falls between AWMM11001 and AWMM99999, this is the right service manual series.

Q: I just do basic maintenance. Is this the right document?

A: If you're doing real repairs or diagnostics, yes. For simple fluid changes and basic intervals only, the operator's handbook or a maintenance manual is usually enough.

Bottom line: If you own or service an E19 in that serial range and you're doing actual repair work, this is the correct Bobcat service manual to buy.

📘 Show Index

Table of Contents:

  • MAINTENANCE SAFETY
  • CONTENTS
  • FOREWORD
    • FOREWORD
    • SAFETY INSTRUCTIONS
      • Avoid Silica Dust
    • FIRE PREVENTION
      • Maintenance
      • Operation
      • Electrical
      • Hydraulic System
      • Fueling
      • Starting
      • Spark Arrester Exhaust System
      • Welding And Grinding
      • Fire Extinguishers
    • SERIAL NUMBER LOCATIONS
      • Excavator Serial Number
      • Engine Serial Number
    • DELIVERY REPORT
    • EXCAVATOR IDENTIFICATION
  • SAFETY & MAINTENANCE
    • LIFTING AND BLOCKING THE EXCAVATOR
      • Procedure
    • LIFTING THE EXCAVATOR
      • Procedure
    • OPERATOR CAB (ROPS / TOPS)
      • Description
      • Cab Door
      • Front Window
      • Front Wiper
      • Window Washer Reservoir
      • Right Side Window
      • Heating And Ventilation Ducting
    • OPERATOR CANOPY (ROPS / TOPS)
      • Description
    • TRANSPORTING THE EXCAVATOR ON A TRAILER
      • Loading And Unloading
      • Fastening
    • TAILGATE
      • Opening And Closing
      • Adjusting The Latch
    • RIGHT SIDE COVER
      • Opening And Closing Right Side Cover
    • SERVICE SCHEDULE
      • Maintenance Intervals
      • Inspection Checkbook
    • AIR CLEANER SERVICE
      • Daily Check
      • Replacing The Filter Elements
    • CAB FILTER
      • Cleaning And Maintenance
    • ENGINE COOLING SYSTEM
      • Cleaning
      • Checking Level
      • Removing And Replacing Coolant
    • FUEL SYSTEM
      • Fuel Specifications
      • Biodiesel Blend Fuel
      • Filling The Fuel Tank
      • Fuel Filter
      • Draining The Fuel Tank
      • Removing Air From The Fuel System
    • ENGINE LUBRICATION SYSTEM
      • Checking And Adding Engine Oil
      • Engine Oil Chart
      • Removing And Replacing Oil And Filter
    • HYDRAULIC SYSTEM
      • Checking And Adding Hydraulic Fluid
      • Hydraulic / Hydrostatic Fluid Chart
      • Removing And Replacing The Hydraulic Filters
      • Removing And Replacing The Hydraulic Fluid
    • LUBRICATING THE EXCAVATOR
      • Lubrication Locations
    • TRAVEL MOTOR
      • Checking And Adding Fluid
      • Removing And Replacing Fluid
    • SPARK ARRESTER MUFFLER
      • Cleaning Procedure
    • ALTERNATOR BELT
      • Belt Adjustment
      • Belt Replacement
    • SEAT BELT
      • Inspection And Maintenance
    • CONTROL CONSOLE LOCKOUTS
      • Inspection And Maintenance
    • PIVOT PINS
      • Inspection And Maintenance
    • TOWING THE EXCAVATOR
      • Procedure
    • EXCAVATOR STORAGE AND RETURN TO SERVICE
      • Storage
      • Return To Service
    • STOPPING THE ENGINE AND LEAVING THE EXCAVATOR
      • Procedure
    • EMERGENCY EXIT
      • Side Or Rear Window
      • Front Window
    • REMOTE START TOOL KIT – MEL1563
      • Remote Start Tool – MEL1563
      • Service Tool Harness Communicator – MEL1566
    • REMOTE START TOOL (SERVICE TOOL) KIT – 7217666
      • Description
      • Remote Start Tool (Service Tool) – 7022042
      • Excavator Service Tool Harness – 6689747
      • Computer Service Tool Harness – 6689746
  • HYDRAULIC SYSTEM
    • HYDRAULIC/HYDROSTATIC SCHEMATICS
    • HYDRAULIC SYSTEM INFORMATION
      • Glossary Of Hydraulic / Hydrostatic Symbols
      • Troubleshooting The Hydraulic Circuit
      • Troubleshooting The Cylinder Circuit
      • Troubleshooting The Swing (Upperstructure Slew) Circuit
      • Troubleshooting The Travel Circuit
    • CYLINDER (BOOM)
      • Testing
      • Removal And Installation
      • Parts Identification
      • Disassembly
      • Assembly
    • CYLINDER (ARM)
      • Testing
      • Removal And Installation
      • Parts Identification
      • Disassembly
      • Assembly
    • CYLINDER (BOOM SWING)
      • Testing
      • Removal And Installation
      • Parts Identification (Earlier Models)
      • Disassembly (Earlier Models)
      • Assembly (Earlier Models)
      • Parts Identification (Later Models)
      • Disassembly (Later Models)
      • Assembly (Later Models)
    • CYLINDER (BUCKET)
      • Testing
      • Removal And Installation
      • Parts Identification
      • Disassembly
      • Assembly
    • CYLINDER (BLADE)
      • Testing
      • Removal And Installation
      • Parts Identification
      • Disassembly (Earlier Models)
      • Assembly (Earlier Models)
      • Parts Identification (Later Models)
      • Disassembly (Later Models)
      • Assembly (Later Models)
    • CYLINDER (TRACK FRAME EXPANSION)
      • Testing
      • Removal And Installation
      • Parts Identification (Earlier Models)
      • Disassembly (Earlier Models)
      • Assembly (Earlier Models)
      • Parts Identification (Later Models)
      • Disassembly (Later Models)
      • Assembly (Later Models)
    • VALVE (MAIN RELIEF)
      • Description
      • Test Conditions
      • Testing And Adjusting Main Relief At Manifold
      • Testing And Adjusting Main Relief At Hydraulic Control Valve
    • VALVE (PORT RELIEF)
      • Testing And Adjusting
    • VALVE (CROSS PORT RELIEF)
      • Testing
      • Removal And Installation
    • VALVE (PRESSURE REDUCING)
      • Testing And Adjusting
    • HYDRAULIC CONTROL VALVE
      • Description
      • Removal And Installation
      • Parts Identification
      • Disassembly
      • Assembly
      • Right And Left Travel Valve Section Disassembly And Assembly
      • Arm And Bucket Valve Section Disassembly And Assembly
      • Boom Swing And Auxiliary Valve Section Disassembly And Assembly
      • Boom Valve Section Disassembly And Assembly
      • Slew Valve Section Disassembly And Assembly
      • Blade Valve Section Disassembly And Assembly
    • HYDRAULIC PUMP
      • Description
      • Torque Adjustment
      • Testing The Piston Pump
      • Testing The Gear Pump
      • Testing Auxiliary Hydraulic Flow
      • Removal And Installation
      • Parts Identification
      • Disassembly And Assembly
      • Gear Pump Disassembly
      • Gear Pump Assembly
      • Piston Pump Disassembly
      • Piston Pump Assembly
    • MANIFOLD ASSEMBLY / ACCUMULATOR
      • Description
      • Removal And Installation
      • Parts Identification
    • ACCUMULATOR
      • Removal And Installation
    • TRAVEL MOTOR (SINGLE SPEED)
      • Description
      • Removal And Installation
      • Parts Identification
      • Disassembly
      • Assembly
    • TRAVEL MOTOR (TWO SPEED)
      • Description
      • Removal And Installation
      • Parts Identification
      • Disassembly
      • Assembly
    • SWIVEL JOINT
      • Description
      • Removal And Installation
      • Parts Identification
      • Disassembly
      • Assembly
    • SWING MOTOR
      • Description
      • Removal And Installation
      • Parts Identification
      • Motor Disassembly
      • Motor Assembly
      • Brake Carrier Disassembly And Assembly
    • CONTROL LEVER (JOYSTICK) (RIGHT)
      • Testing
      • Handle Removal And Installation
      • Joystick Assembly Removal And Installation
      • Parts Identification
      • Disassembly
      • Assembly
    • CONTROL LEVER (JOYSTICK) (LEFT)
      • Testing
      • Handle Removal And Installation
      • Joystick Assembly Removal And Installation
      • Parts Identification
      • Disassembly
      • Assembly
    • HYDRAULIC FILTER MOUNT
      • Description
      • Removal And Installation
    • HYDRAULIC RESERVOIR
      • Description
      • Removal And Installation
    • OIL COOLER
      • Removal And Installation
    • BLADE / TRACK EXPANSION SOLENOID BLOCK
      • Description
      • Block Removal And Installation
      • Solenoid Removal And Installation
      • Parts Identification
      • Block Disassembly And Assembly
  • UNDERCARRIAGE
    • BLADE
      • Description
      • Extension Removal And Installation
      • Blade Removal And Installation
    • TRACK UNDERCARRIAGE COMPONENTS
      • Description
      • Track Lug Height
      • Checking Tension
      • Adjusting Tension
      • Track Removal And Installation
      • Idler Removal And Installation
      • Track Tensioner Removal And Installation
      • Track Tensioner Disassembly & Assembly
      • Roller Removal And Installation
      • Sprocket Removal And Installation
      • Removal And Installation Of Expandable Track Frame
    • TRACK MAINTENANCE
      • Track Damage Identification
    • SWING CIRCLE GEAR
      • Removal And Installation
  • UPPERSTRUCTURE & SWING
    • UPPERSTRUCTURE
      • Description
      • Removal
      • Installation
    • ROPS CANOPY
      • Removal And Installation
    • CAB
      • Removal And Installation
      • Door Removal And Installation
      • Front Window Removal And Installation
      • Right Side Sliding Window Removal And Installation
      • Glass Removal
      • Glass Installation
    • SEAT AND SEAT MOUNT
      • Removal And Installation
    • LEFT CONSOLE
      • Console Cover Removal And Installation
      • Gas Spring Removal And Installation
      • Lock Lever Removal And Installation
      • Console Removal And Installation
    • LEFT UPPERSTRUCTURE COVER
      • Removal And Installation
    • RIGHT UPPERSTRUCTURE COVER
      • Removal And Installation
    • ENGINE SPEED CONTROL
      • Removal And Installation
      • Cable Adjustment
    • BLADE CONTROL
      • Removal And Installation
    • RIGHT PEDAL (BOOM SWING)
      • Removal And Installation
      • Disassembly And Assembly
    • TRAVEL CONTROLS
      • Removal And Installation
      • Disassembly And Assembly
    • LEFT PEDAL (AUXILIARY)
      • Disassembly And Assembly
    • CONTROL LINKAGE ASSEMBLY
      • Removal And Installation
      • Disassembly And Assembly
    • FLOOR MAT AND FLOOR PANELS
      • Description
      • Removal And Installation
    • FUEL TANK
      • Removal And Installation
    • HORN
      • Removal And Installation
    • SWING FRAME
      • Description
      • Removal And Installation
      • Bushing Removal And Installation
      • Swing Frame Bushing Removal
      • Swing Frame Bushing Installation
    • BOOM
      • Description
      • Removal And Installation
      • Boom Bushing Removal And Installation
    • ARM
      • Description
      • Removal And Installation
      • Arm To Boom Bushing Removal And Installation
      • Arm To Bucket And Bucket Link Bushing Removal And Installation
    • BUCKET
      • Removal And Installation
    • TAILGATE
      • Removal And Installation
      • Latch Removal And Installation
    • COUNTERWEIGHT
      • Removal And Installation
    • OPERATOR HOOD
      • Removal And Installation
    • QUICK COUPLER (KLAC™ SYSTEM)
      • Troubleshooting
      • Daily Inspection
      • Removal And Installation
      • Parts Identification
      • Disassembly
      • Assembly
    • QUICK COUPLER (LEHNHOFF® SYSTEM)
      • Troubleshooting
      • Daily Inspection
      • Removal (MS03 And MS08)
      • Installation (MS03 And MS08)
      • Parts Identification (MS03)
      • Disassembly And Assembly (MS03)
      • Parts Identification (MS08)
      • Disassembly (MS08)
      • Assembly (MS08)
    • RIGHT SIDE COVER
      • Removal And Installation
    • TOOL BOX
      • Removal And Installation
  • ELECTRICAL SYSTEM
    • ELECTRICAL SCHEMATICS
    • ELECTRICAL SYSTEM INFORMATION
      • Glossary Of Electrical Symbols
      • Troubleshooting
      • Description
      • Fuse And Relay Location / Identification
    • BATTERY
      • Location
      • Servicing
      • Maintaining Battery Charge Level
      • Battery Service During Machine Storage
      • Battery Testing
      • Battery Charging
      • Using a Booster Battery (Jump Starting)
      • Removing And Installing The Battery
    • ALTERNATOR
      • Belt Adjustment
      • Belt Replacement
      • Charging System Inspection
      • Alternator Voltage Testing
      • Removal And Installation
      • Parts Identification
    • STARTER
      • Testing
      • Removal And Installation
      • Parts Identification
    • LIGHTS
      • Boom Light Removal And Installation
      • Boom Light Bulb Replacement
      • Cab Light Removal And Installation
      • Cab Light Bulb Replacement
    • MAGNETIC LOCKOUT SENSOR
      • Removal And Installation
    • TWO-SPEED SWITCH
      • Removal And Installation
    • FUEL LEVEL SENDER
      • Removal And Installation
      • Testing
    • DIAGNOSTIC SERVICE CODES
      • Viewing Service Codes
      • Number Codes List (S/N B3LA11001 & Above And B3LB11001 & Above)
      • Number Codes List (S/N AWMM11001 & Above And B4PK11001 & Above)
    • CONTROL PANEL SETUP
      • Password Setup (Keyless Start Panel)
      • Password Lockout Feature
      • Password Setup (Deluxe Instrument Panel)
      • Maintenance Clock
      • Standard Instrument Panel
      • Reset
    • KEY SWITCH
      • Removal And Installation
    • WIPER MOTOR
      • Removal And Installation
    • MOTION ALARM SYSTEM
      • Description
      • Inspecting
      • Adjusting Switch Position
  • ENGINE
    • ENGINE INFORMATION
      • Description
      • Specifications
      • Crankshaft Re-Grind Data
      • Torque Values
      • Troubleshooting
      • Engine Removal And Installation
      • Engine Mount Replacement
      • Engine Compression – Testing
    • SPARK ARRESTER MUFFLER
      • Removal And Installation
    • AIR CLEANER
      • Removal And Installation
    • ENGINE COOLING SYSTEM
      • Radiator / Oil Cooler Removal And Installation
      • Fan Removal
      • Water Pump Removal And Installation
      • Thermostat Removal And Installation
      • Thermostat – Testing
    • LUBRICATION SYSTEM
      • Oil Pan Removal And Installation
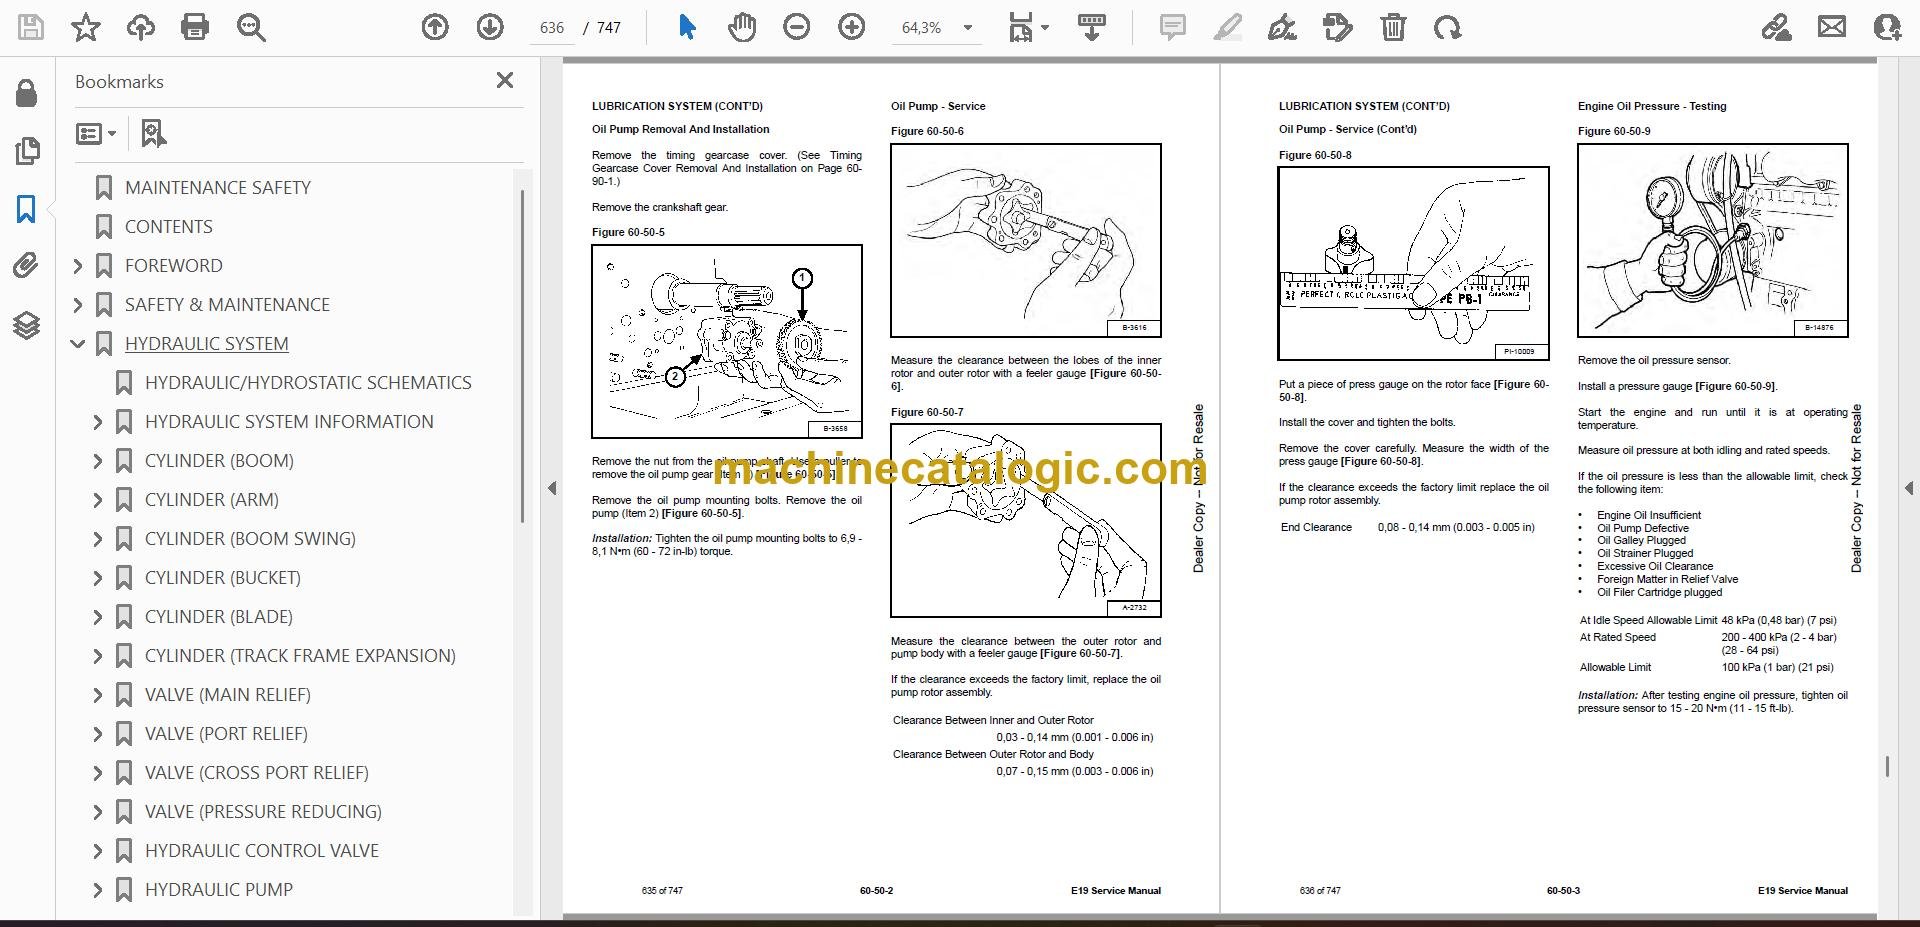
      • Oil Pump Removal And Installation
      • Oil Pump – Service
      • Engine Oil Pressure – Testing
    • FUEL SYSTEM
      • Fuel Shutoff Solenoid Removal And Installation
      • Fuel Injection Pump – Testing
      • Fuel Injection Pump Removal And Installation
      • Fuel Injection Pump – Timing
      • Fuel Camshaft Removal And Installation
      • Fuel Camshaft Governor
      • Fuel Injector Removal And Installation
      • Fuel Injector Nozzle Pressure – Testing
    • CYLINDER HEAD
      • Glow Plug Removal And Installation
      • Valve Clearance Adjustment
      • Valve Timing – Checking
      • Cylinder Head Removal And Installation
      • Cylinder Head Disassembly And Assembly
      • Cylinder Head – Servicing
      • Cylinder Head Top Clearance
      • Valve Guide – Servicing
      • Valve And Valve Seat Reconditioning
      • Valve Spring
      • Valve Tappets
      • Rocker Arm And Shaft – Servicing
    • CRANKSHAFT AND PISTONS
      • Piston And Connecting Rod Removal And Installation
      • Piston And Connecting Rod Disassembly And Assembly
      • Piston And Connecting Rod – Servicing
      • Cylinder Bore – Measuring
      • Connecting Rod Alignment
      • Crankshaft Gear Removal And Installation
      • Crankshaft And Bearings Removal And Installation
      • Crankshaft And Bearings – Servicing
    • CAMSHAFT AND TIMING GEARS
      • Timing Gearcase Cover Removal And Installation
      • Timing Gears Measuring Backlash
      • Idler Gear And Camshaft Removal And Installation
      • Idler Gear And Shaft – Servicing
    • FLYWHEEL AND HOUSING
      • Flywheel Housing Removal And Installation
      • Hydraulic Pump Coupler Removal And Installation
      • Flywheel Removal
      • Flywheel Installation
      • Rear End Plate Removal And Installation
  • HEATING AND VENTILATION
    • HEATER SYSTEM
      • Description
      • Components
    • REGULAR MAINTENANCE
      • Filter Element Removal And Installation
      • Heater Coil
    • HEATER UNIT
      • Removal And Installation
    • HEATER COIL
      • Removal And Installation
    • HEATER FAN
      • Removal And Installation
    • HEATER VALVE
      • Removal And Installation
  • SPECIFICATIONS
    • EXCAVATOR SPECIFICATIONS
      • Machine Dimensions
      • Machine Dimensions (Standard Arm)
      • Machine Dimensions (Long Arm)
      • Rated Lift Capacity – With Standard Arm And Canopy (No Demolition Kit)
      • Rated Lift Capacity – With Standard Arm And Canopy (With Demolition Kit)
      • Rated Lift Capacity – With Standard Arm, Optional Counterweight And Canopy (No Demolition Kit)
      • Rated Lift Capacity – With Standard Arm, Optional Counterweight And Canopy (With Demolition Kit)
      • Rated Lift Capacity – With Standard Arm And Cab (No Demolition Kit)
      • Rated Lift Capacity – With Standard Arm And Cab (With Demolition Kit)
      • Rated Lift Capacity – With Standard Arm, Optional Counterweight And Cab (No Demolition Kit)
      • Rated Lift Capacity – With Standard Arm, Optional Counterweight And Cab (With Demolition Kit)
      • Rated Lift Capacity – With Long Arm And Canopy (No Demolition Kit)
      • Rated Lift Capacity – With Long Arm And Canopy (With Demolition Kit)
      • Rated Lift Capacity – With Long Arm, Optional Counterweight And Canopy (No Demolition Kit)
      • Rated Lift Capacity – With Long Arm, Optional Counterweight And Canopy (With Demolition Kit)
      • Rated Lift Capacity – With Long Arm And Cab (No Demolition Kit)
      • Rated Lift Capacity – With Long Arm And Cab (With Demolition Kit)
      • Rated Lift Capacity – With Long Arm, Optional Counterweight And Cab (No Demolition Kit)
      • Rated Lift Capacity – With Long Arm, Optional Counterweight And Cab (With Demolition Kit)
      • Performance
      • Controls
      • Engine
      • Hydraulic System
      • Hydraulic Cylinders
      • Hydraulic Cycle Times
      • Electrical
      • Drive System
      • Slew System
      • Undercarriage
      • Capacities
      • Tracks
      • Ground Pressure
      • Environmental
      • Temperature Range
    • TECHNICAL SERVICE GUIDE SPECIFICATIONS
      • Engine
      • Engine Torques
      • Cooling System
      • Excavator Torques
    • TORQUE SPECIFICATIONS FOR BOLTS
      • Torque For General SAE Bolts
      • Torque For General Metric Bolts
    • HYDRAULIC CONNECTION SPECIFICATIONS
      • O-ring Face Seal Connection
      • Straight Thread O-ring Fitting
      • Tubelines And Hoses
      • Flare Fitting
      • Port Seal Fitting
    • HYDRAULIC FLUID SPECIFICATIONS
      • Specifications
    • CONVERSIONS
      • Decimal And Millimeter Equivalent Chart
      • U.S. To Metric Conversion Chart
    • SERVICE TOOLS REQUIRED
      • Remote Start Tools
      • Hydraulic Tools
      • Engine Tools
      • Electrical Tools
      • General Tools
      • HVAC Tools
  • ALPHABETICAL INDEX
  • SERVICE SCHEDULE SYMBOLS

Bobcat Software

Bobcat PDF Manuals

Related Manuals

0
    0
    Your Cart
    Your cart is emptyReturn to Shop